Nuke Callouts: All Nuke Map Callouts in CS2
Contents
Nuke is one of Counter-Strike's oldest and most iconic maps. First released almost three decades ago in November 1999, the map has undergone a fair share of aesthetic and functional changes, but managed to preserve the elegant simplicity it is famed for. We even still see it today in the pools of major CS2 tournaments like IEM Katowice and PGL RMR Copenhagen.
If you want to find any success when playing on this venerable map, you’ll need to learn the callouts on Nuke in CS. Good callout knowledge is especially important here, as Nuke is packed full of hiding spots, twisty corridors, and vertical engagements. It might seem outright impossible to keep all that info in your head at all times, but if you practice hard enough, it will become your second nature in no time. In this article, we’ll list all CS callouts on Nuke to make the learning process a bit easier. Read on, and by the end of it, you’ll be able to name the main Nuke positions by heart.
How Nuke Callouts Work in CS2
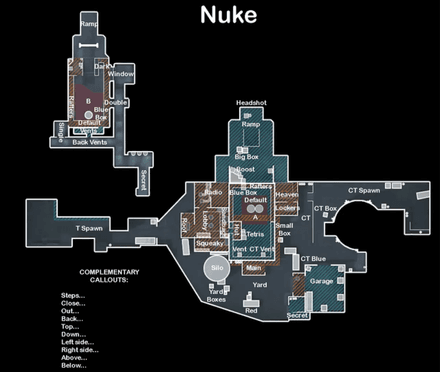
Nuke map callouts are the short and easy-to-use names for essential positions or locations on the map. Those are used to quickly share information in-game and plan your team’s strategy. When it comes to Nuke spots in particular, visual recognition is your best friend, as the map itself is one of the most difficult to navigate strategically. It’s multi-level, timing-sensitive, and communication-heavy.
Still, memorizing Nuke map locations names will give you and your team an edge impossible to get otherwise. This knowledge is what often separates good teams from great ones.
CS2 Nuke Map Callouts by Zones
As one of the most unique and complex maps in CS2, Nuke has a vertical layout with bombsites stacked on top of each other and multiple access points. What this means for you is that there’s quite a lot of Nuke map positions to memorize, and navigating this nuclear power plant can be a true nightmare.
We’ve divided Nuke calls into a few groups by their map zones to make the info more digestible. The four categories of Nuke positions in CS2 are:
- T Spawn and Outside;
- CT Spawn and A Plant;
- Lobby and Ramp;
- B Cross and B Plant.
The key positions you must pay close attention to are the Outside (Silo), Lobby, Ramp, Garage, A and B plants, and Secret. The map doesn’t have a lot of tricky barrels or boxes for hiding like Inferno does, so getting a mental hold of Nuke’s ambush spaces should be a bit easier. Besides, you’ll need to learn the callouts if you plan to learn any CS2 Nuke wallbangs.
Now, let's break down each of the four groups in detail and list all the Nuke callouts CS2 has in store.
T Spawn and Outside
When it’s your turn to play for Ts, this will be your main staging and rotation area. Most T-side strategies focus on either getting Outside under control to secure fast and efficient Secret access or following the A split to pressure the CTs.
T Spawn
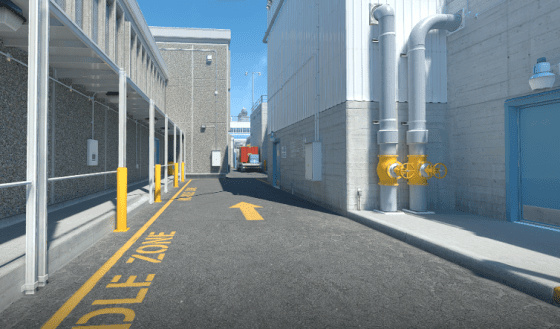
The Terrorist starts each round at this location. The spawn itself is a narrow corridor with a van on the right, some trash cans and boxes, and a fence ahead of you.
Van
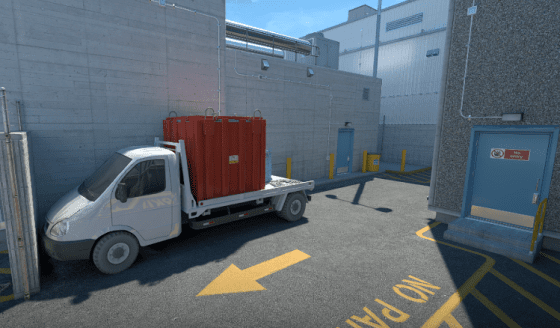
A bright white and red truck parked near the T Spawn, which can work as cover in a pinch.
T Start
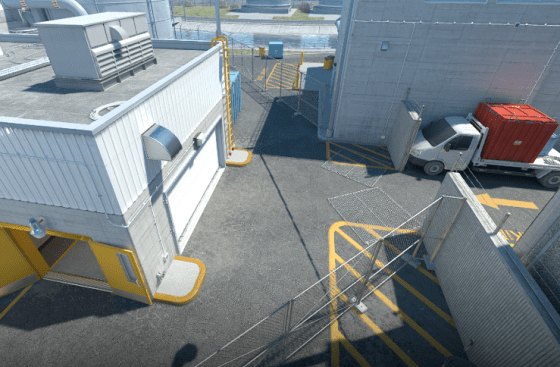
An outside area near the fence and Van that you’ll pass before entering the Lobby or proceeding to the Secret.
Escape
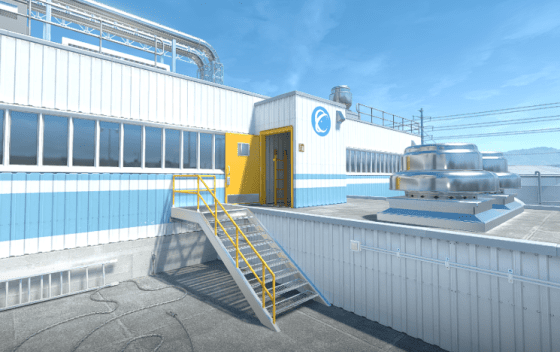
A passage to the Lobby from the T Roof, easily identifiable thanks to a shiny yellow door near the stairs.
T Roof
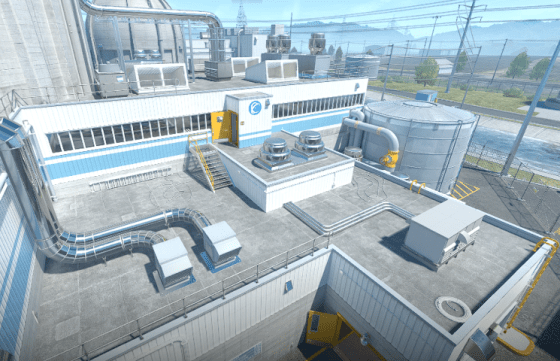
A great spot for controlling the map and/or jumping to the Silo. You can climb it from either the T Spawn or the Lobby.
Silo
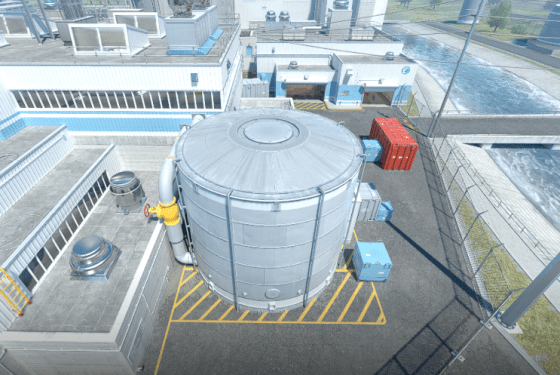
The tall silo next to the nuclear reactor, also called the Marshmallow. Climbing it gives you an extremely advantageous position, especially if you’re playing as a sniper. However, be aware that the enemy’s AWPer will likely be sighting this spot from the CT Blue or the Garage.
T Red
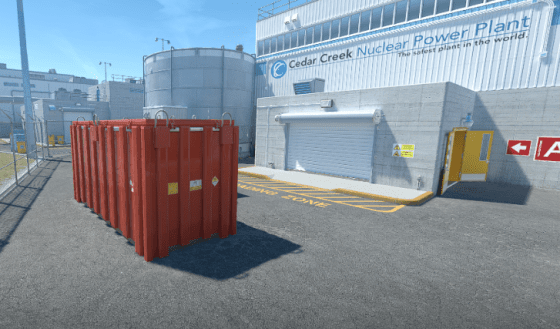
This Nuke callout refers to the huge red crate in the Outside area below the Silo. The box can provide some entry cover close to the Terrorists' side of the map.
Outside Boxes
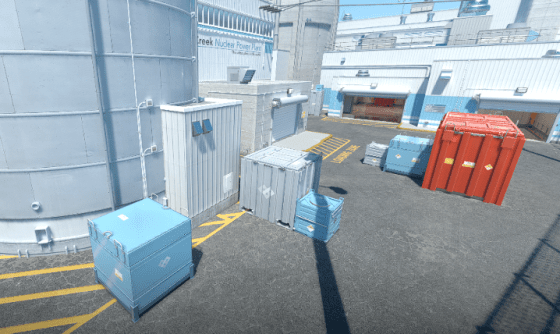
A set of three crates, painted in blue and silver, covering your passage to the Red and through the Outside. A popular spot for T-side Nuke smokes if your team needs to safely pass into the Secret.
Outside
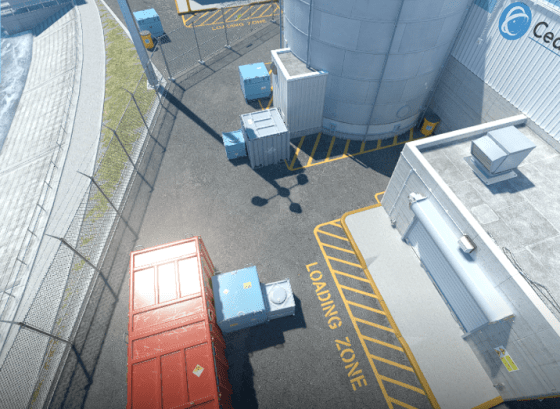
A large open space where several other Nuke callouts are located. It connects the T Spawn, Garage, and Secret. Plus, you can enter the A Plant from here (assuming you can survive).
Main Drop
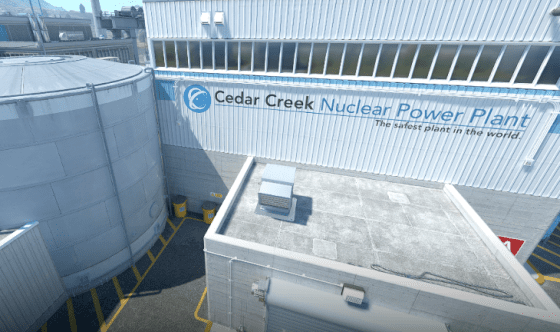
A roof of the A’s entrance that you’ll land on when jumping from the Silo.
Sandwich Africa
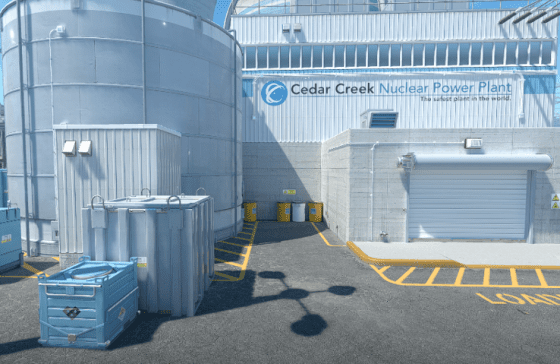
A cozy area near the Outside Boxes where you can hide or set up an ambush. It’s located directly between the Silo and the Main Drop’s building.
Secret
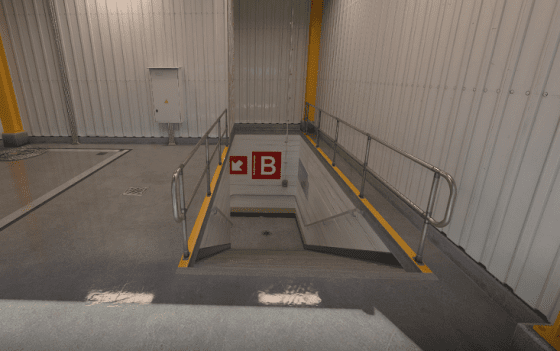
A ladder on the B Plant next to the Garage allows you to enter the underground level of the power plant.
Garage
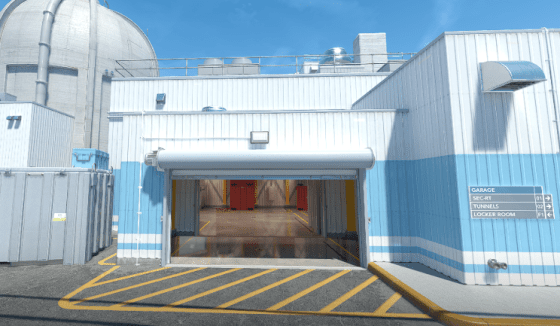
There is a big garage near the ladder that leads to the plant’s lower level. It’s a great place to ambush people going to B, as it’s filled with crates and boxes. Additionally, this is an excellent position for AWPers.
CT Blue/CT Red
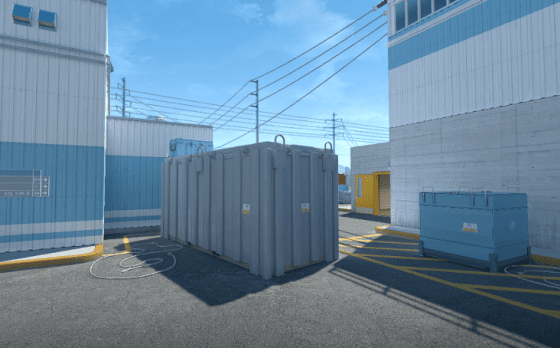
Red gets its name from the red crates located there, so it’s little surprise that Blue is named after the blue ones you can see on the street. Positioned opposite of A’s entrance, it can be used as a cover during close-range firefights or AWP duels.
CT Spawn and A Site
That’s where you start laying out all your CT defensive setups, taking over the Outside and Garage, and securing early positions on the A bombsite and Heaven. The most important tip for this location is to always seize control over the Hut and Rafters as quickly as possible before the Ts rush A.
CT Spawn
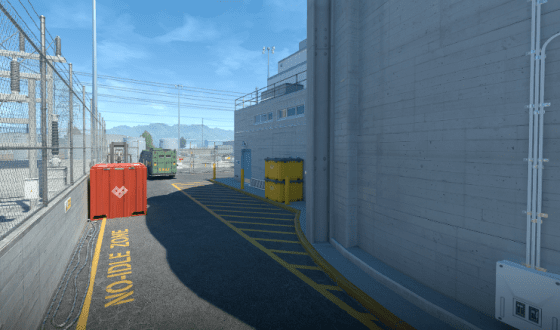
The location of the Counter-Terrorist team's spawn. Just as with the Ts, this is a narrow corridor leading straight to the Hell and CT Start. Once you reach the end of this corridor, you’ll see the Small, the CT boxes, and several ways to reach the Outside.
Hell
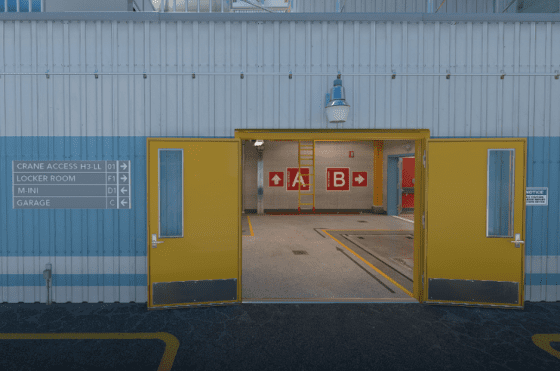
A small area right underneath the Heaven, hence the name. Here you can enter the nuclear plant room or follow through to the Ramp. This is the most popular entrance point for the Counter-Terrorist team, as it is located right next to the CT Spawn.
CT Start
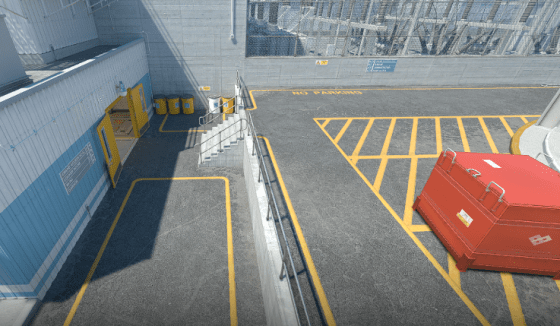
It’s the small yard you cross before storming the plant or proceeding to the CT Blue and Garage. Here you can find stairs, boxes, doors to Hell, and some yellow and white barrels.
Catwalk
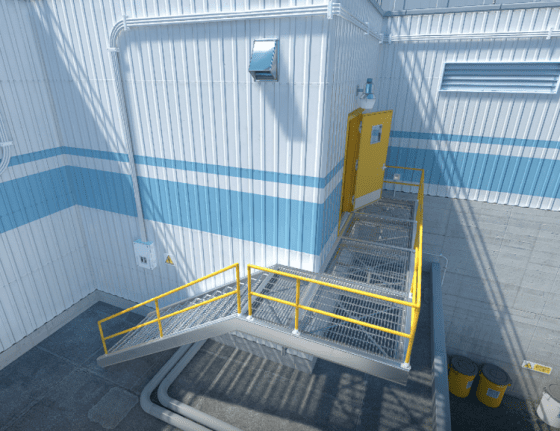
A short ladder from the Heaven to CT Roof, where you can hide and set up unexpected attacks.
CT Roof
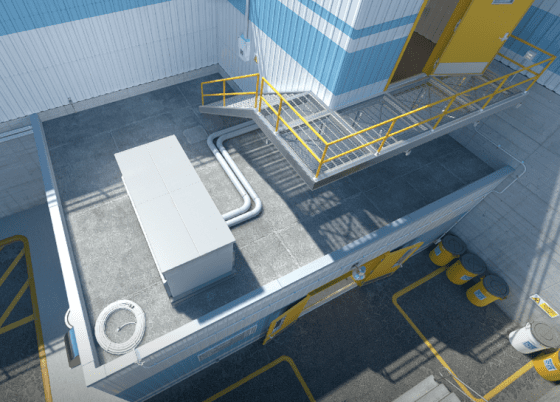
Ts have their Main Drop, and Counter-Terrorists have the CT Roof between the Heaven and Hell. It has a ventilation system box that can work as a cover for Riflers and AWPers.
Heaven
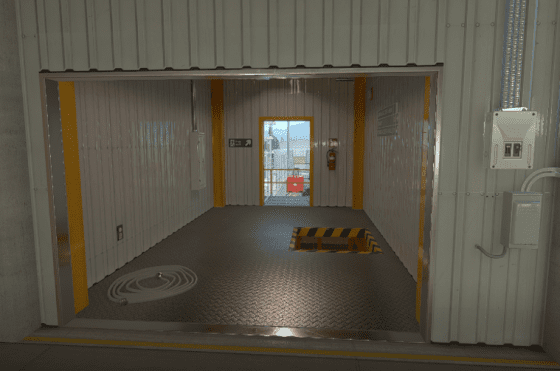
An area above the A Plant with a street view. Here, you can set up a strong A defence when necessary.
Lockers
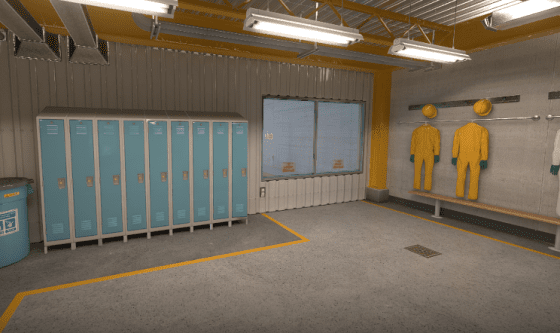
A small room with lockers for plant workers under the CT Roof. It’s close to the Heaven and, thus, the A Plant.
Glass
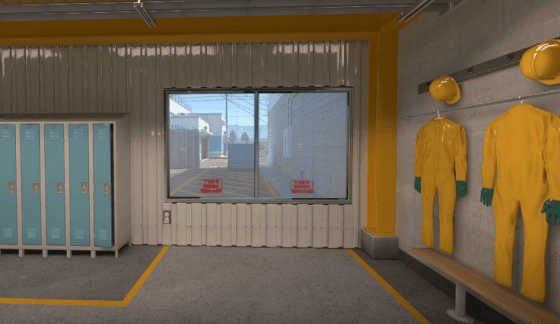
Breakable glass windows in the Lockers that you can shoot through or use to monitor the Secret and Main.
Ladder
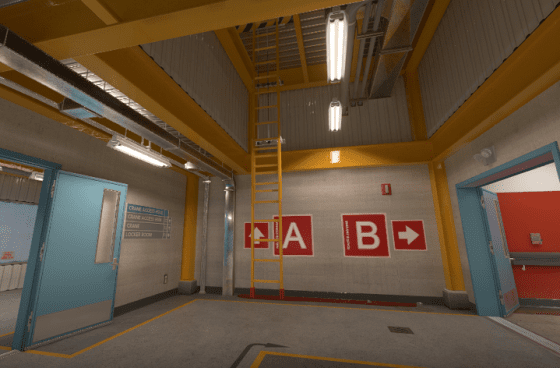
A bright yellow ladder that leads from the Hell to Heaven. Poetic.
Main
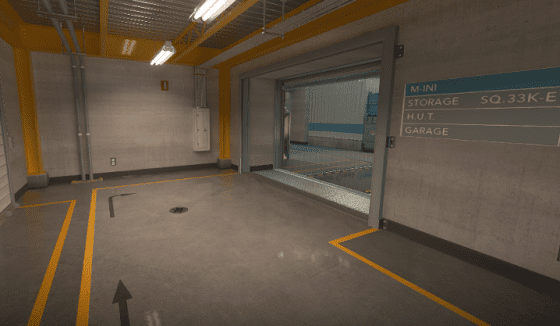
The main entrance to the power plant, located near the Outside and Garage.
Vent
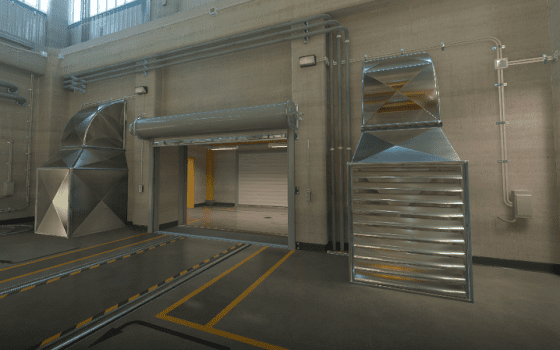
It’s one of the oldest callouts on Nuke in CS — a conveniently placed ventilation shaft between the Main and Squeaky on the A Plant. Once you break the bars, it becomes a quick passage from A to B.
Tetris
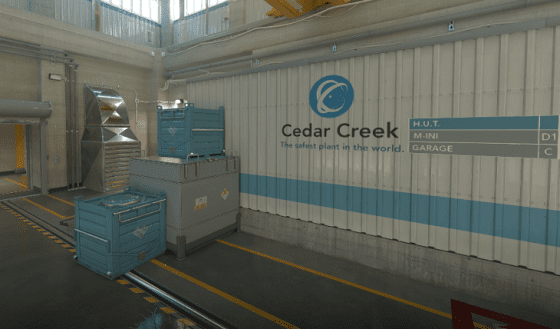
Two blue boxes and one big gray box stationed across Main and near the Squeaky on A. You can jump on top of them to monitor the area, but it's better to use them to get to the Above Hut.
Squeaky (A)
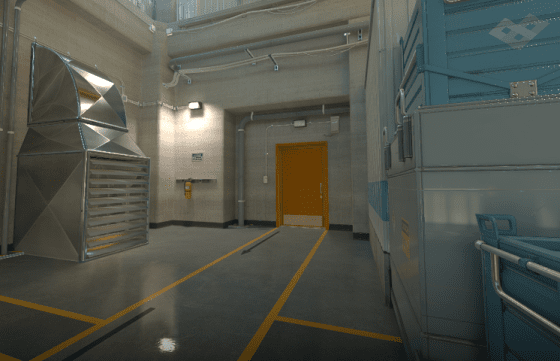
An orange door near the Vent. It’s a common entry point for the attacking Ts coming from the Lobby. However, you can also shoot a hole in the Squeaky to peak and get an early warning.
Corner
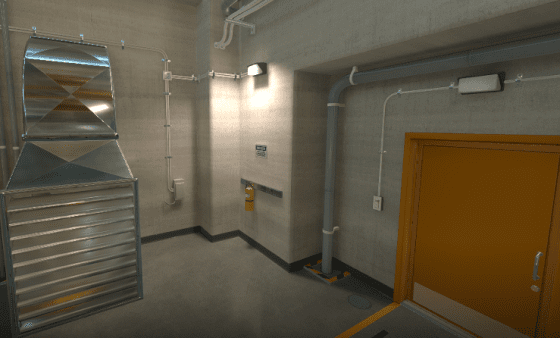
A small area between the Vent and Squeaky.
Old Second
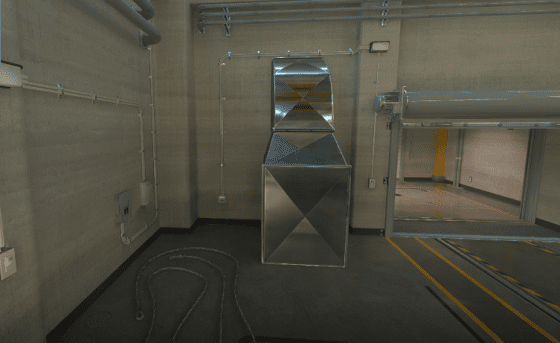
Another corner that offers a hiding spot behind the second vent shaft.
Drop
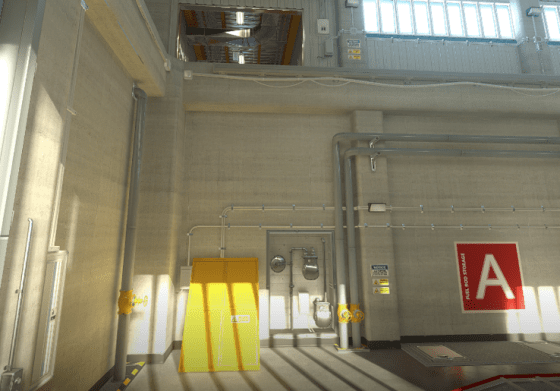
A small panel you should try to land on when jumping from the Heaven to avoid fall damage.
A Default
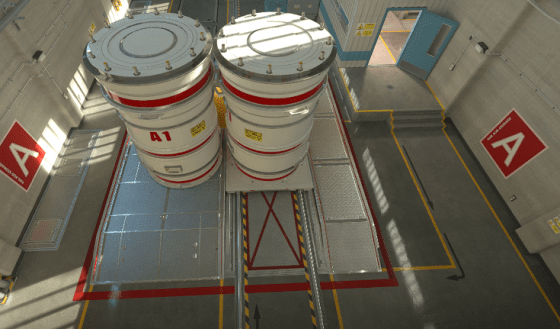
The default position for an A bomb plant. However, there are several alternative places for planting around the Default area.
Blue Box
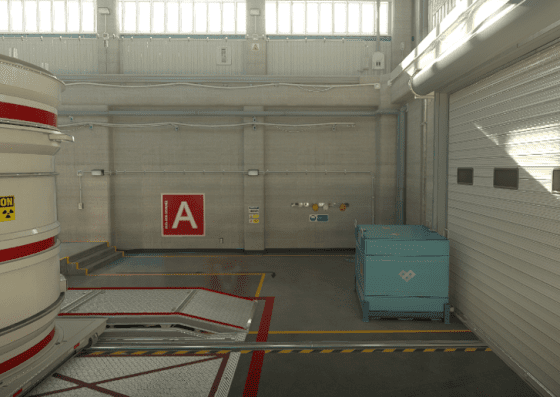
A big blue crate, located in the far corner of the A Plant behind the Default.
Mustang
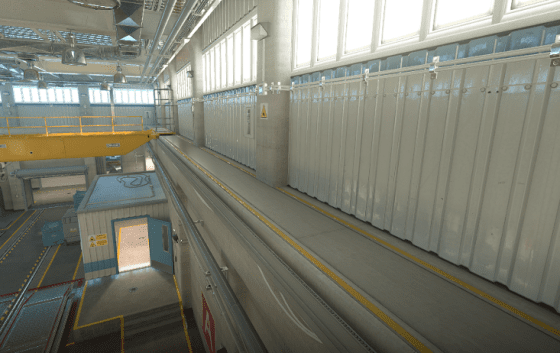
A raised area near the Hut exit. As a Terrorist, you should keep in mind that there is almost always a CT on the Mustang.
Rafters
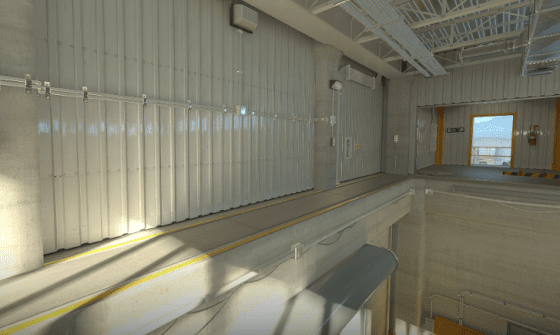
This is the name given to the ledges at the top of the A Plant. Those who control this second-level position have a comprehensive view of the whole plant area, including Main.
Bridge
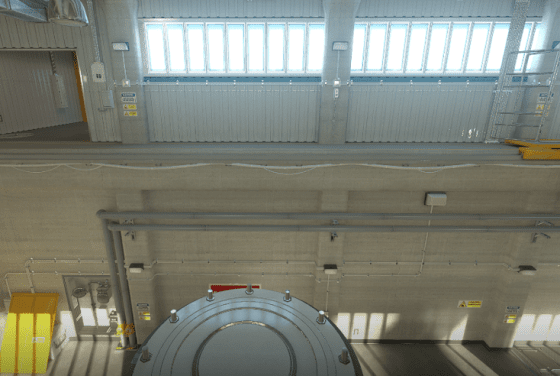
A ledge to the left of the Heaven window, offering a commanding view of the Hut and Default.
Hut
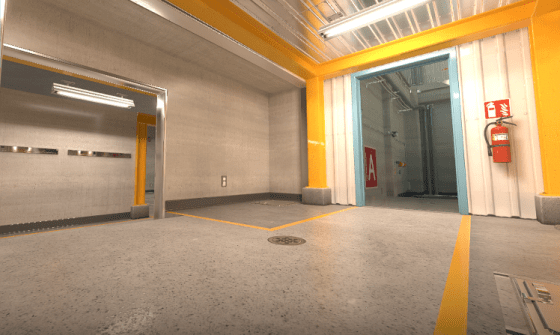
A small room made of iron sheets. It's one of the most important CS Nuke callouts, as this is a default T entry point when storming A.
Above Hut
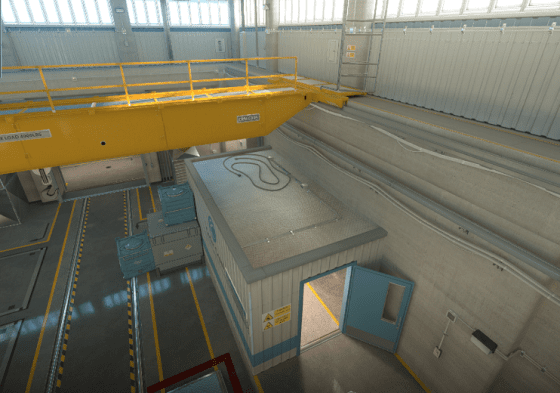
The Hut's roof is accessible via Tetris or from the Mustang. It's a great spot for setting up ambushes.
Lobby and Ramp
Controlling the Nuke positions in this area is as challenging as it gets. However, if your team gets harassed through the weak Radio Room and Ramp, the main path to B will lie wide open. This entire location is a critical transition zone that requires heavy use of utilities and proper knowledge of all the related Nuke map names.
Turn Pike
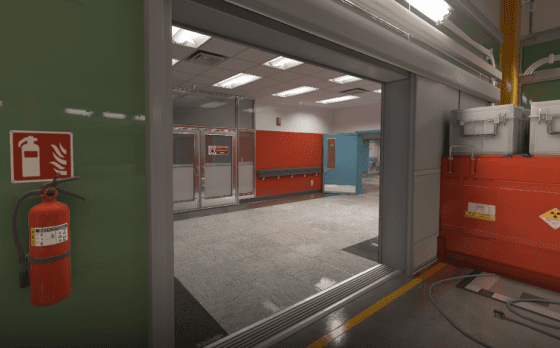
This room is located opposite the Control and near the Ramp. You'll have to go through it to get from the Hell to the Ramp.
Stack
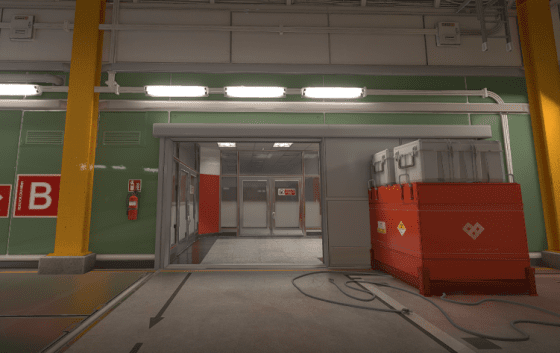
A corner near the Turn Pike and the entrance of the Ramp, with two small crates (gray and red) to take cover behind.
Boost
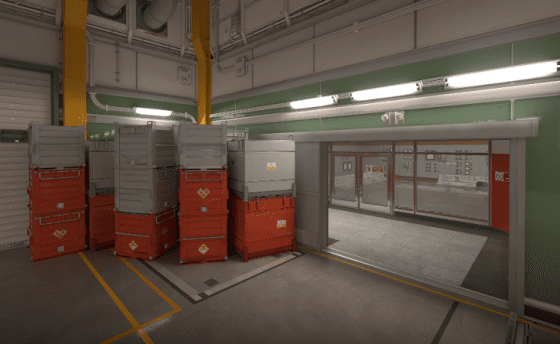
The name of this callout comes from the tactic known as boosting. By jumping onto the set of crates in the corner near Control and then onto your teammates' shoulders, you can get to a higher and more favorable firing position.
Big Box
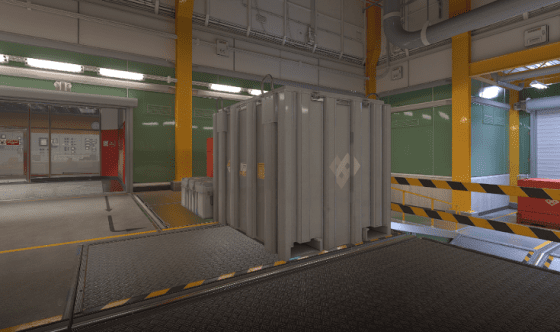
There is a big gray crate near the Ramp that you can hide behind and shoot back while your teammates break through to the B Plant (or prevent this push if you’re playing as CTs).
Control/Control Room
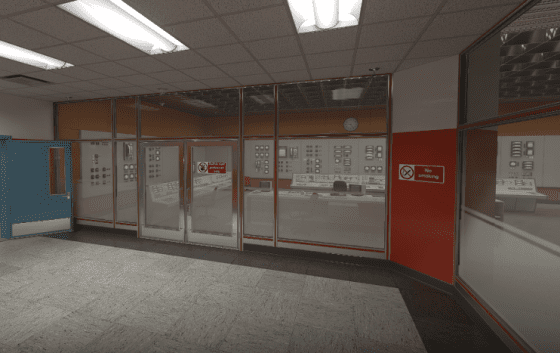
A small room connecting the Trophy and Radio that leads to the Ramp. We recommend checking it with a HE or Molotov before entering.
Ramp
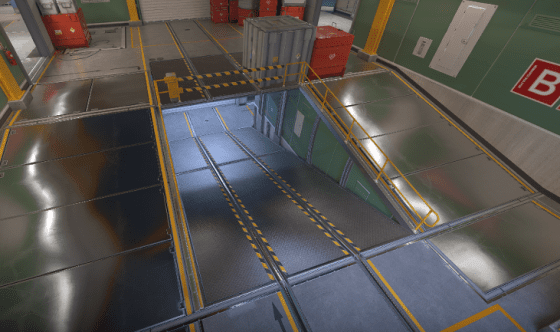
This is the name of the entrance to the B Plant. The entry is a descent to the underground level of the room.
HS (Headshot)
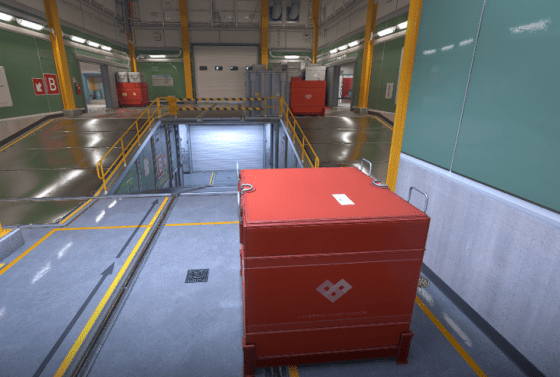
One of the most iconic Nuke callouts in CS2. This box at the back of the Ramp is a convenient sniper position, which is how the callout got its name. From there, you can pre-fire the Control and Trophy.
Lobby
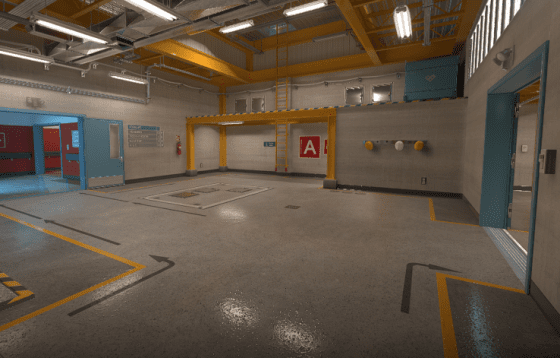
The entrance to the power plant room from the T side with a lot of open space. From here, you can access the A Plant or the Ramp.
Squeaky
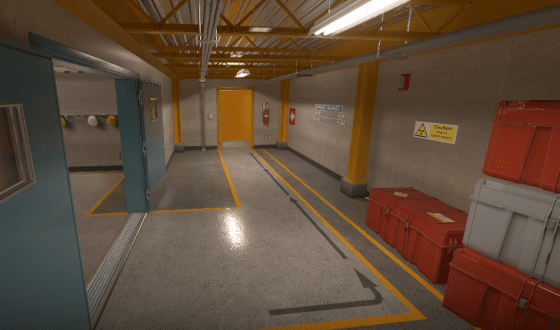
As we’ve mentioned before, this is a narrow area enclosed by a squeaky yellow door that can give away your position. Usually entered by the attacking side.
Sandbags (Squeaky)
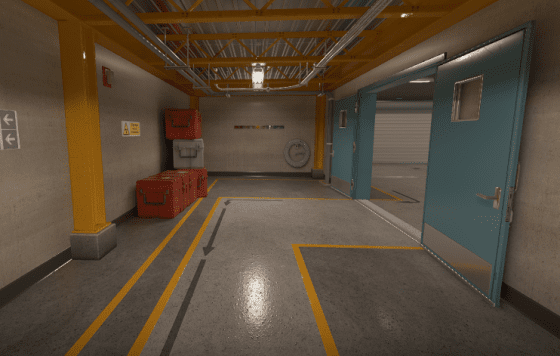
A bunch of crates stacked on top of each other in the short corridor behind the Squeaky door. They can provide a bit of cover in a difficult situation.
Radio
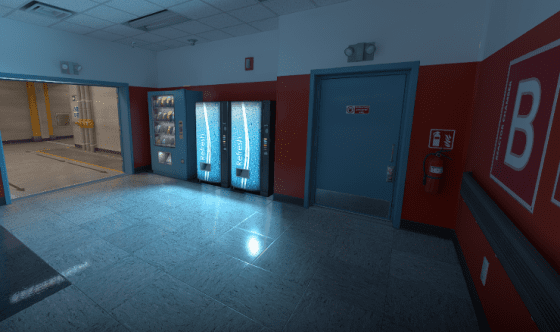
This room provides access to the Ramp from the Lobby side. The area previously featured the power plant’s communication room, hence the name. In the current version of the map, it’s filled with vending machines.
Trophy
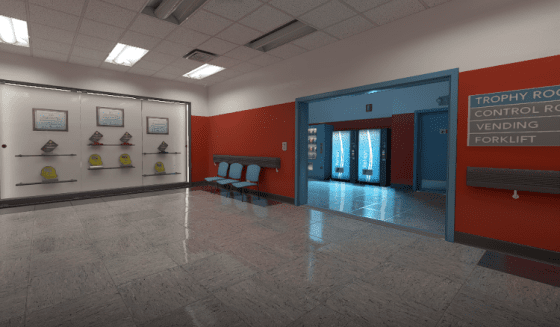
The room next to the Radio. On its wall, you can spot shiny trophies stored behind glass.
Ladder (Lobby)
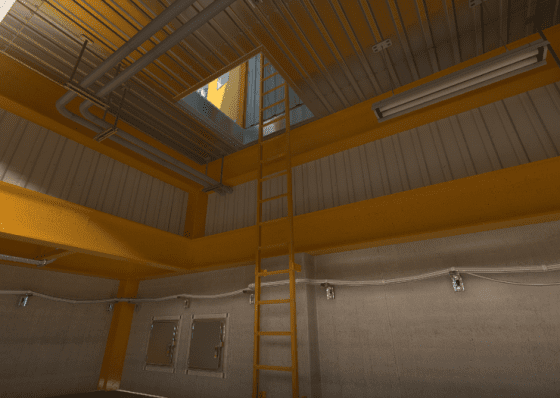
This one leads from the T Roof to the Lobby.
Sandbags (Lobby)
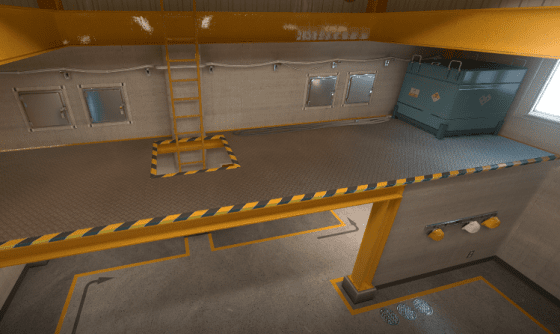
The middle area between the T Roof and the Lobby that you can access by climbing the Ladder. There is a big blue crate in the far corner, perfect for ambushing rushing opponents.
B Cross and B Site
Unlike A, the B bombsite is super tight and highly uncomfortable for retakes due to all the doors and windows found there. It’s so post-plant heavy and rotation-dependent that many pro teams protect it way more than A.
Long
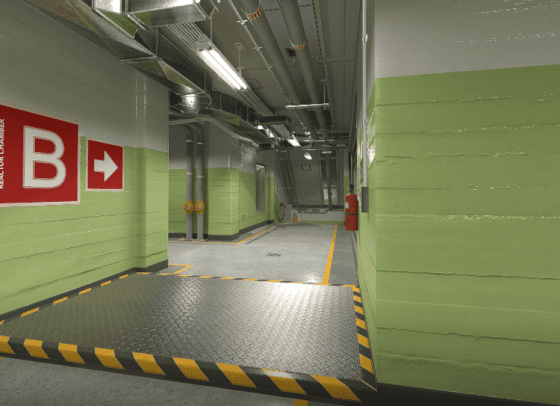
A narrow tunnel accessible from the Secret or the Vent, leading to the B Plant through the Double Doors. This is an extremely hot spot where intense close combat often takes place.
Back Vents
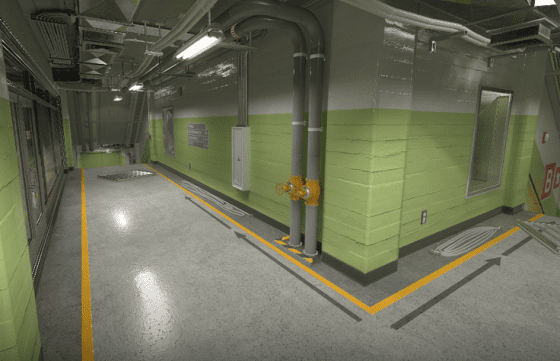
A short corridor that allows you to get to the Decon without using a ventilation shaft.
Decon/Single Door
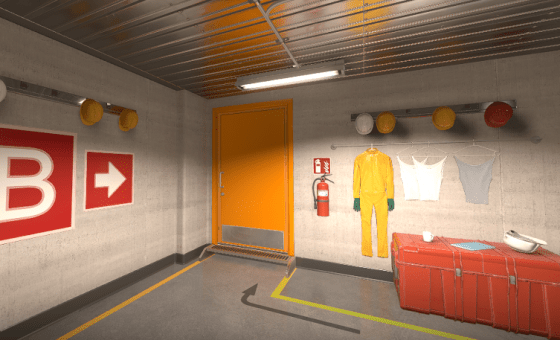
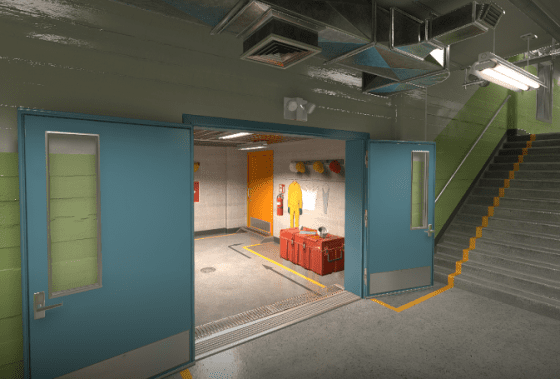
You can pass through this small underground room to get to the orange door that leads to the B Plant.
Double Doors
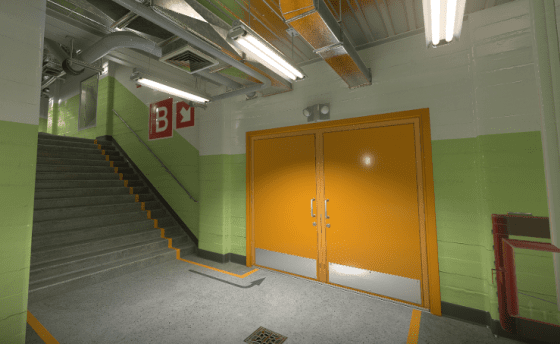
Another entrance to the B Plant. You’ll have to pass through here if you approach the plant from the Long.
Window Aqua
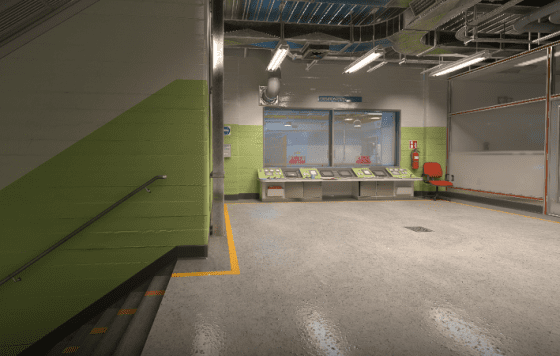
A control room above the B Plant featuring a glass wall. You can break it to get inside or access the room from the Double Doors’ corridor.
Left
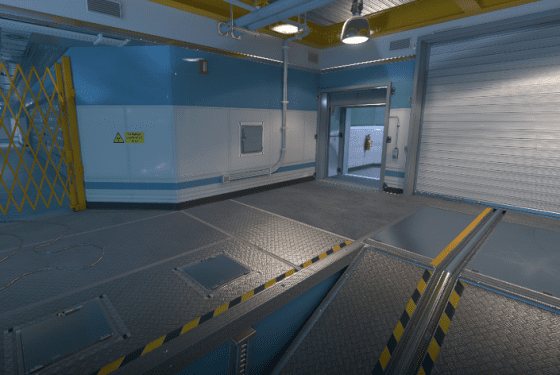
The upper left entrance to B from the Ramp.
Right
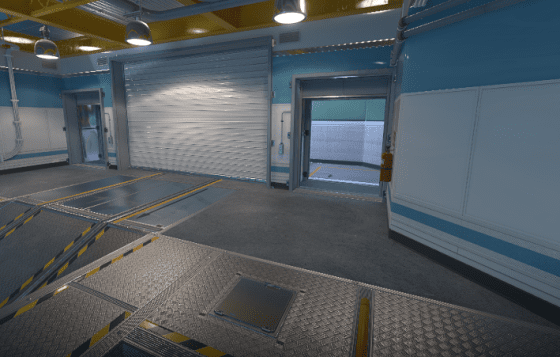
The upper right entrance to B from the Ramp.
Bottom Ramp
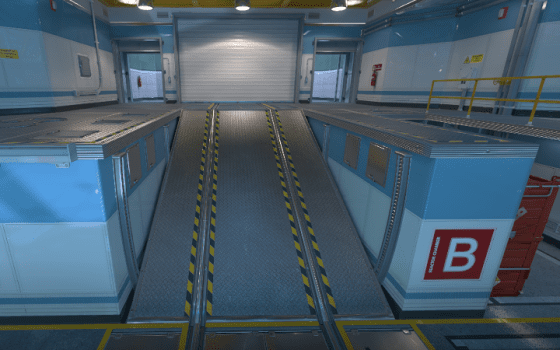
The end of the Ramp leads directly to the B Plant, Ninja Toxic, and Dark.
Dark
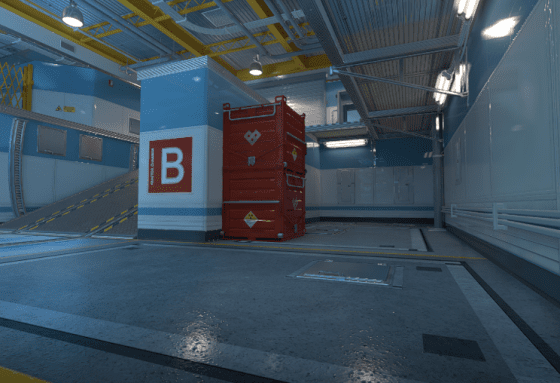
A dark and dangerous corner of the B Plant near the Bottom Ramp. It is very convenient for holding the area and setting up ambushes.
Ninja Toxic
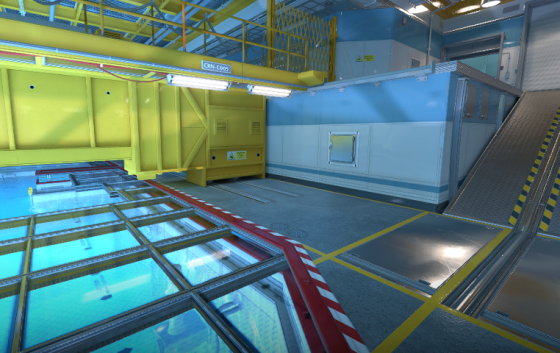
The spot with hazardous barrels on the B Plant opposite the Dark. Pro attackers sometimes plant the bomb in this corner.
B Default
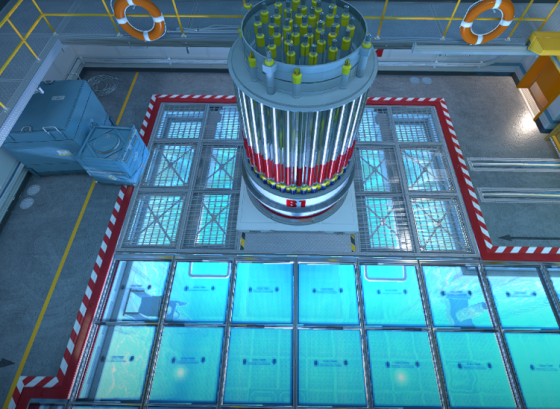
It's one of the essential CS Nuke map callouts, often used to plant the bomb. It is located on the far side of the site and can cause a lot of trouble for Counter-Terrorists.
B Rafters
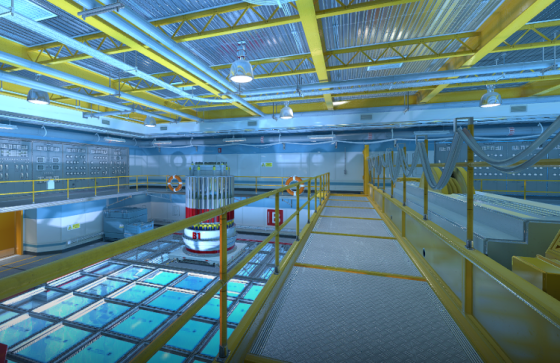
The ledges that encompass the entire B Plant.
Blue Box
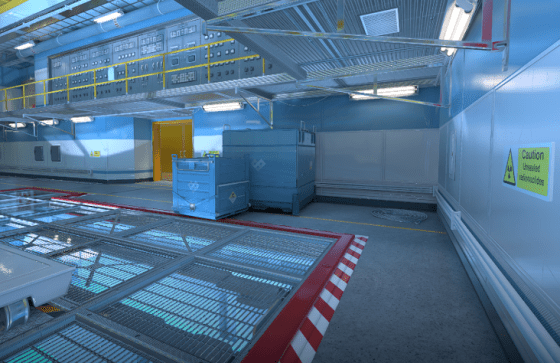
Two blue crates in the corner near the Double Doors. Frequently used as a hiding spot, so be careful!
Behind Silo
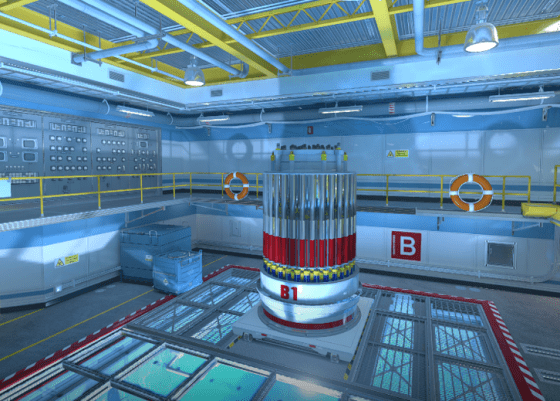
A small silo at the B Default. You can hide behind it either on the lower level or the Rafters.
If you’ve already processed all this info (we’re impressed!) and are looking for more relevant content, check out Overpass callouts.
How to Learn Nuke Callouts Faster
There are a few practical tips on how to better memorize all these callout names:
- Focus on zones rather than individual names. Study the chunks of the map before narrowing it down to single Nuke positions across each area.
- Learn A and Outside before anything else. Starting with these two locations is the optimal strategy for beginners, as they house the majority of the map’s vents, ladders, and doors.
- Put it into practice! Use Nuke CS2 callouts as much as possible in real matches to coordinate with your teammates and soon you’ll know them by heart.
Additionally, do regular offline map walkthroughs and demo reviews. Watch official CS2 tournaments and pro players’ streams to study how pro teams use the callouts Nuke offers in their matches.
Conclusion
Learning Nuke map locations names is crucial for surviving and succeeding when playing this map. Mastering the callouts will help you rotate across the map like a pro, coordinate with your battle buddies, and generally improve your teamwork. Once you learn Nuke calls, you’ll be able to easily locate and report your position or warn your teammates of danger. And if you're playing for more than just fun and plan to one day reach Global Elite, learning all the Nuke CS2 callouts is practically mandatory.
FAQ
Among the CS2 Nuke callouts, several spots seem designed for setting ambushes. One of the most prominent ones is the Rafters, where you can cover the entire A or B Plant. Window Aqua, Garage, and Heaven also work well.
The best spots on the Nuke map for AWPers are the Headshot, CT Blue/CT Red, and the positions behind the boxes on each site. These locations have adequate cover and allow a good sniper to control a large chunk of the map.
Like most maps, Nuke is easier to play on the defensive side. Counter-Terrorists have short and sheltered entrances to all the critical locations. Some consider Nuke one of the most CT-sided maps in the competitive map pool.
Nuke is a well-balanced map, but many pro players find it too small. Most Nuke callouts encourage close-range fights, which is less than ideal for snipers and riflers. Hence, the Desert Eagle and Tec-9 will shine pistol rounds. Farm guns could be efficient for fast rush calls, and AK-47 or M4A4/M4A1 are always a good choice.
