Best Wallbang Spots on Mirage for Both Teams (CT & T-Side) + How to Use
Contents
- Most Useful Wallbang Spots for Counter-Terrorists on the Mirage Map
- Most Useful Wallbang Spots for Terrorists on the Mirage Map
- Top of mid -> Sniper’s Nest
- Middle -> Sniper’s Nest
- Apartments -> B Shop window
- Back alley -> Left B pillar
- Apartments -> Bombsite B right corner
- Apartments -> Bombsite B
- Apartments -> Van boxes
- Apartments -> Top of the van
- Apartments -> Bombsite B arches
- Apartments -> B Shop window
- Palace -> Balcony corner
- Palace -> Under Scaffolding
- CT Start corridor -> CT Start
The Counter-Strike games are known for a passionate community that builds and supports the whole CS experience as much as the game’s developers. That’s why a true pro player must be community-smart, which means knowing insights and exploits of the game that are hidden beyond the simple gameplay surface. Like wallbangs — random paper-thin spots in walls and objects that can be found on every CS2 map.
Exploiting CS2 Mirage wallbang spots is a great example of how knowledge gives you power beyond skills. And remember — being savvy with your favorite game’s mechanics and maps does not make you a cheater or anything like that. Shoot-through spots in walls and objects are there in the game’s code for the taking.
We give pro tips on the exact time for the best use of all Mirage wallbang points below. Just make sure to know your cs2 mirage callouts to execute these advantageous moves.
As for your weapon of choice for nailing wallbangs, AWP is preferred for the power, accuracy, and range sufficient for making precise and efficient wallbang shots. But you’re free to improvise. Not all Mirage wallbangs in CS2 are the same — AK/M4 can be efficiently used on shorter-distance wallbangs. But not weaker weapons with a scattered bullet spread (like SMGs or pistols).
Most Useful Wallbang Spots for Counter-Terrorists on the Mirage Map
Let’s take a look at the top CS2 Mirage wallbang spots that Counter-Terrorists can use. Using them, you can delay or disrupt enemy pushes completely, even without being seen.
Note: So as not to repeat ourselves, the structure for screenshots will remain the same for the whole article.
CT Start shot-through wall
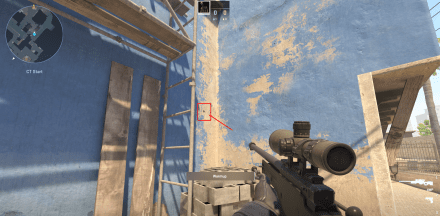
Right near the CT spawn point, there’s yet another CS2 mirage wallbang spot. Go left from the spawn and stop in front of the Scaffolding next to the blue building. Shoot the round blue paint spot to cover the corridor behind the wall with some cross-fire. Throw a grenade into the corridor first to keep foes at bay behind the wall.
Timing: Start/end of the match
Shoot cases: “Just in case” at the start / After Ts rush the mid a bunch of times / After Ts rush A
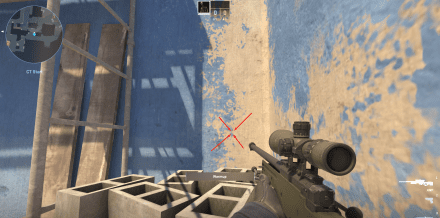
Shooting position
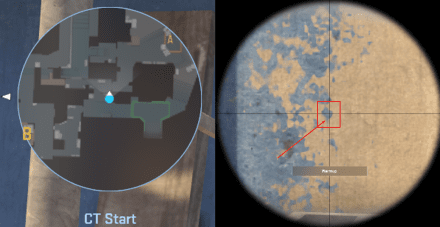
Map spot / Shot spot
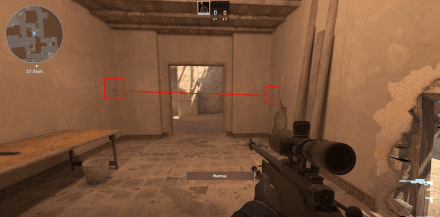
Expected hit location
CT Start -> Scaffolding
If you aim at the same blue wall further from the corner, you can hit one of the most complex top Mirage wallbang spots. Scope right between the second and third steps on the scaffolding ladder. Nailing it, you’ll hit the Palace entrance corner through about 200 meters of walls and other obstacles.
Timing: Middle/end of the match
Shoot cases: After Ts rush the mid a bunch of times / After Ts rush A
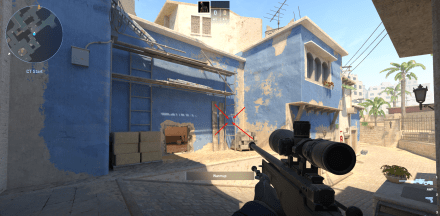
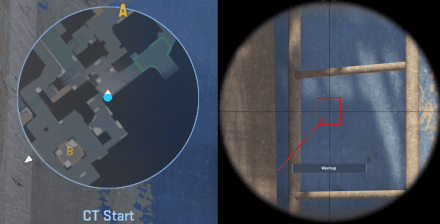
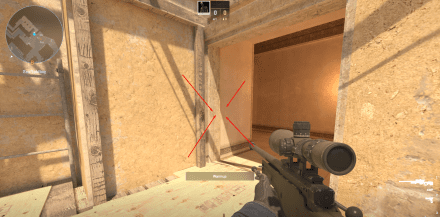
CT Start -> A site
Spawning as a Counter-Terrorist, go right toward the A site. There’s a “sales ticket booth” that you can shoot through. This is one of the best Mirage wallbangs in Counter-Strike 2 to gain a battle advantage when the A site is swarmed with Terrorists and you have to defend it.
Timing: Near the end of the match
Shoot cases: When Ts rush A / Ts are coming out of the Palace
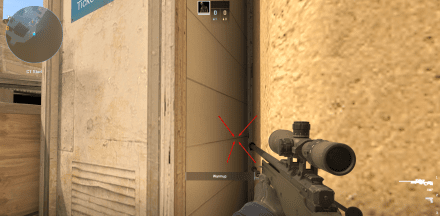
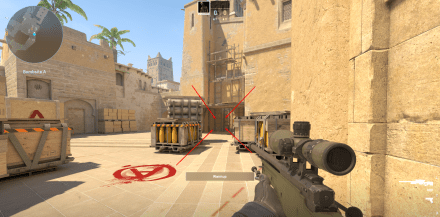
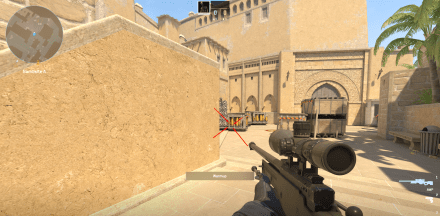
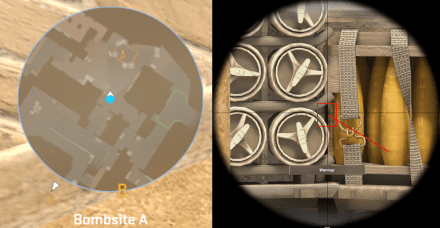
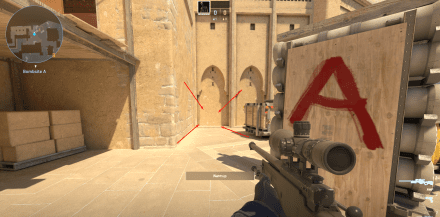
Bombsite A shoot-through boxes
This wallbang can help just-spawned CTs to efficiently cover the corner right behind the ammo boxes in the middle of the A bombsite, which is frequently used as a cover by Terrorists storming the spot.
Timing: Near the end of the match
Shoot cases: When Ts rush A / Ts come out of the Palace
Bombsite A -> Palace/above Scaffolding
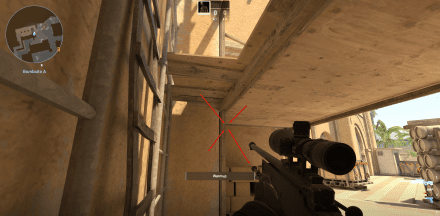
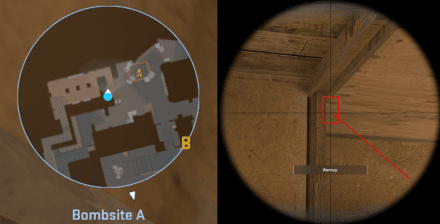
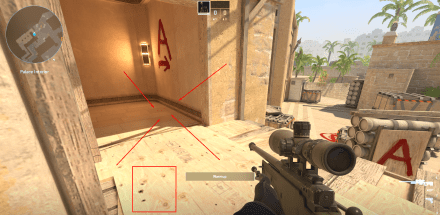
Moving further, take a position under the Scaffolding and shoot through its upper wood planks in the corner. Use this spot to prevent enemies rushing A once you hear somebody running up on the Scaffolding.
Timing: Mid-game
Shoot cases: When Ts rush A / Ts come out of the Palace
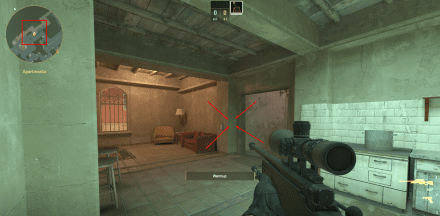
Shop -> Apartments corner
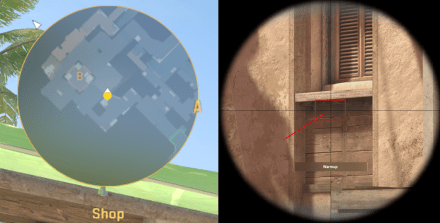
Discovering more Bombsite B wallbangs, make your way to the Shop and peek outside the window overlooking Bombsite B. You will see the window with shutters leading to the Apartment’s kitchen. Now, there are lots of wallbang spots on the other side of this window that Terrorists can exploit, so covering the kitchen with fire can be particularly effective against other wallbang shooters.
Timing: Mid-game
Shoot cases: When Ts rush B / Ts rush through Apartments
Bombsite B -> Apartments
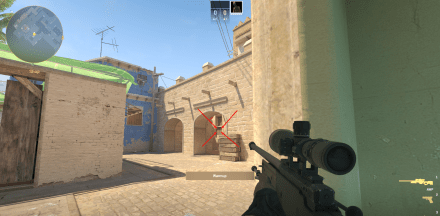
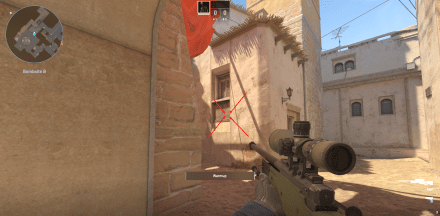
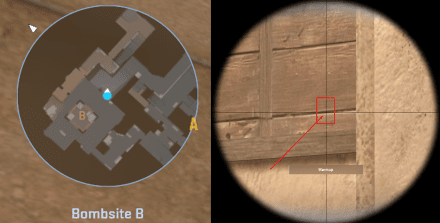
Jump out of the window, approach the right arch in front, and shoot through the planks under the window. There is, most probably, somebody trying to approach the site through the Apartments, and you can stop them.
Timing: Mid-game
Shoot cases: When Ts rush B / Ts rush through Apartments
Bombsite B -> Apartment’s kitchen
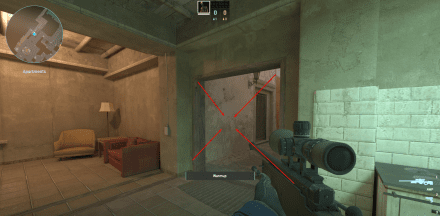
Now, switch your position slightly and stand in the left archway. Our favorite window allows you to shoot efficiently through the kitchen, getting everybody rushing from the T spawn mid-match.
Timing: Mid-game
Shoot cases: When Ts rush B / Ts rush through Apartments / Ts repelled from the A or Middle
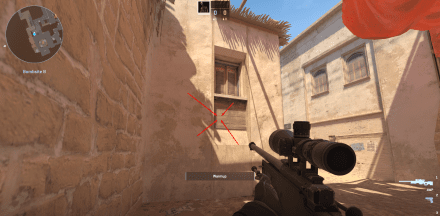
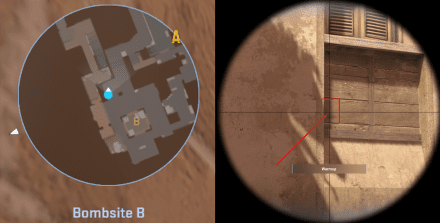
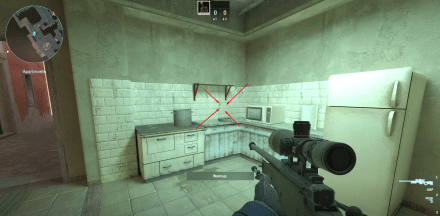
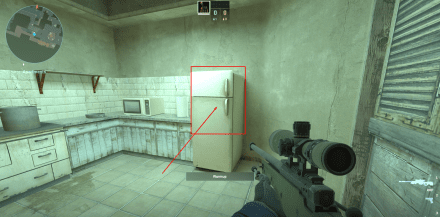
Bombsite B -> Apartment’s kitchen (II)
If you shoot the spot that’s closer to the lower right corner of the same window, you can leave some bloodstains on the fridge in the Apartment’s kitchen of the T player entering this spot.
Timing: Start/mid-game
Shoot cases: When Ts rush B / Ts rush through Apartments / Ts repelled from the A or Middle
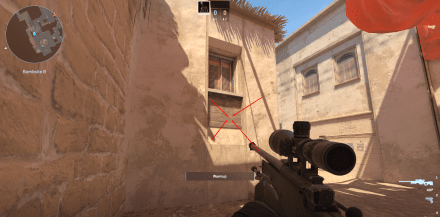
Most Useful Wallbang Spots for Terrorists on the Mirage Map
Now, here are the best CS2 Mirage wallbangs that terrorists can exploit. They are even more important than those for the opposing side, as you want to check all the possible ambush spots when pushing to the bombsites.
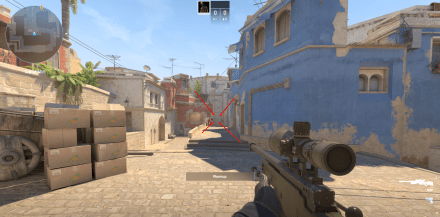
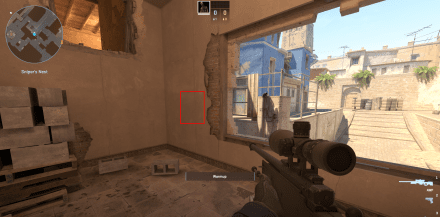
Top of mid -> Sniper’s Nest
First off, closest to the T spawn area is Sniper’s Nest wallbang. Stand by the wall and look through to the opposite side of the Middle. This is a great wallbang to surprise campers in the Sniper’s Nest. You can throw a flashbang into the Nest for added effect.
Timing: First minutes/mid-game
Shoot cases: “Just in case” at the start / When CTs rush Mid / CT sniper camping
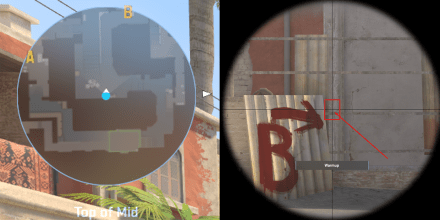
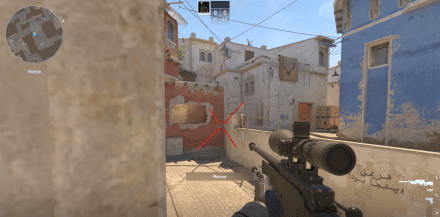
Middle -> Sniper’s Nest
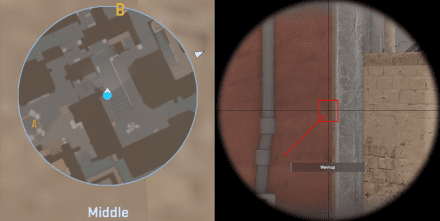
Another way to eliminate Sniper’s Nest campers is by moving a little further along the Middle and taking position behind the wall corner on the left.
Timing: First minutes/mid-game
Shoot cases: “Just in case” at the start / When CTs rush Mid / CT sniper camping
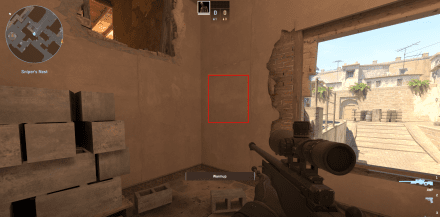
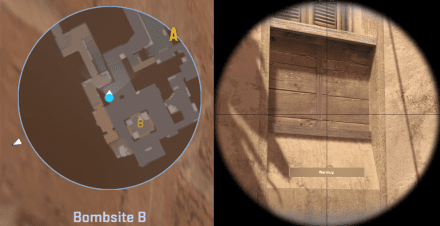
Apartments -> B Shop window
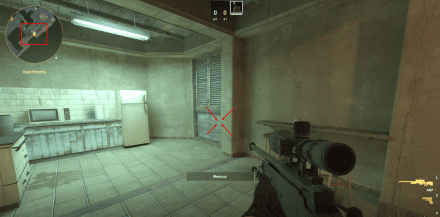
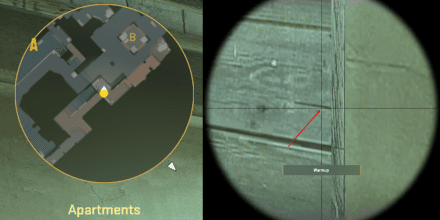
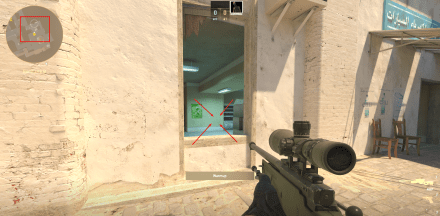
This Apartment’s kitchen window wallbang is a source of numerous useful wallbangs on the Mirage map. For starters, hit the area slightly below the crack line in the wood planks under the shutters (see the screenshot) to cover the Shop window with fire.
Timing: Mid-game/end
Shoot cases: When CTs defend B / While offending CTs on the B site
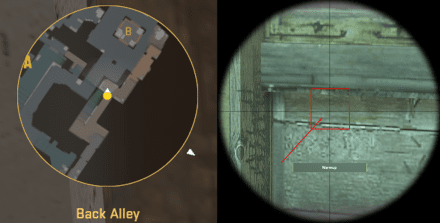
Back alley -> Left B pillar
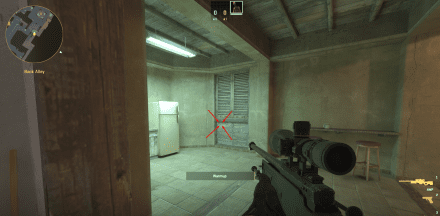
The same window with wooden shutters has another useful CS2 wallbang spot for Mirage. This one lets you cover the left corner of the B site (looking from the Back Alley/Apartments), giving the tactical advantage of cleaning the area in front when storming B.
Timing: Mid-game/end
Shoot cases: When CTs defend B / While offending CTs on the B site
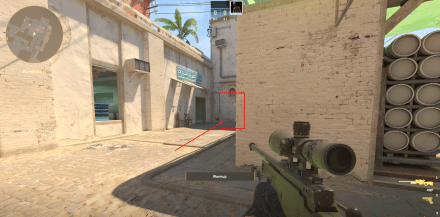
Apartments -> Bombsite B right corner
Back to our recurring CS2 wallbang spot on Mirage. Take a position in front of the kitchen stove and aim at the planks under the shutters. This way, you can kill or at least scare away a CT player who can interfere with your plans to plant the bomb on B.
Timing: Mid-game/end
Shoot cases: When CTs defend B / While offending CTs on the B site
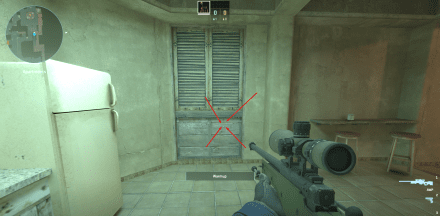
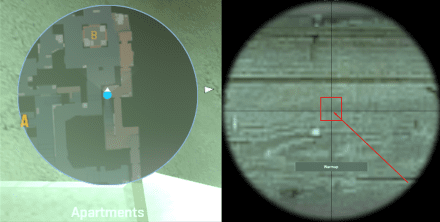
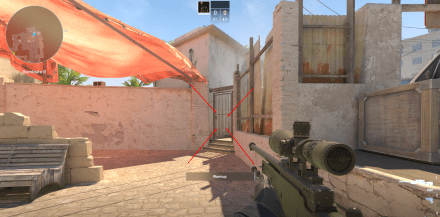
Apartments -> Bombsite B
Here’s a tip: do you hear a foe team’s player defusing the bomb on B? Use this spot as a vantage wallbang to shoot through the whole B side and either prevent planting or defusing the bomb.
Timing: Last minutes of the match
Shoot cases: When CTs defend B / While offending CTs on the B site / After planting a bomb
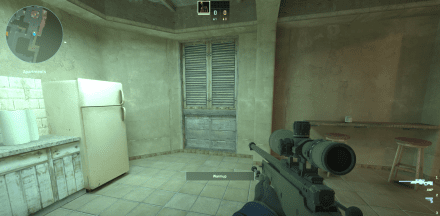
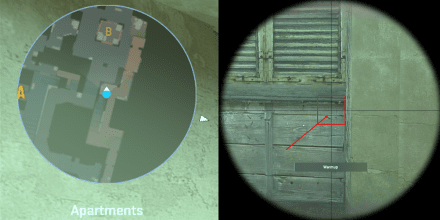
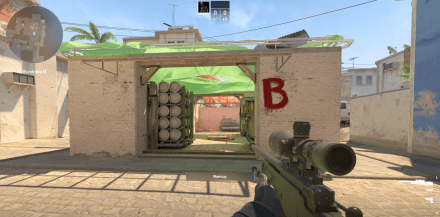
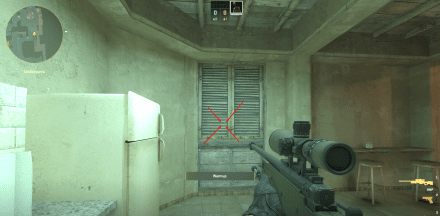
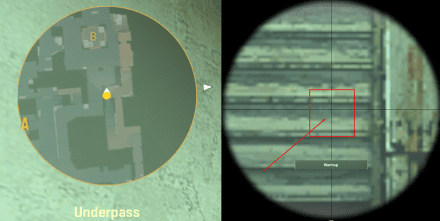
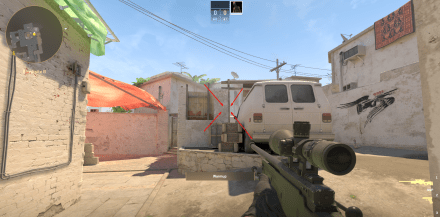
Apartments -> Van boxes
A very efficient CS2 Mirage wallbang spot for covering the area right beside the van near B — you get all the chances to shoot anybody camping on top of the van boxes outside.
Timing: Mid-game/last minutes
Shoot cases: When CTs defend B / While offending CTs on the B site / After planting a bomb
Apartments -> Top of the van
Shooting a different area of the same window from a slightly different position also allows you to hit any player on top of the van.
Timing: Mid-game/last minutes
Shoot cases: When CTs defend B / While offending CTs on the B site / After planting a bomb
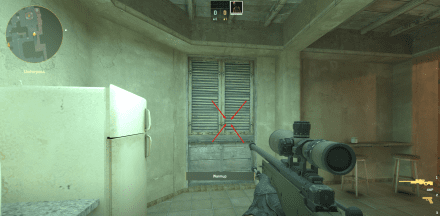
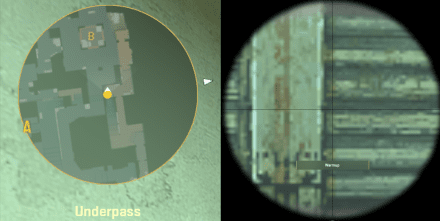
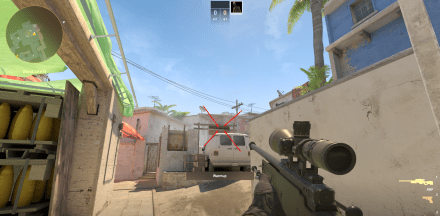
Apartments -> Bombsite B arches
Shooting the Apartment’s kitchen window from yet another position allows you to get a shot at anybody passing the arches in the B yard.
Timing: Mid-game/last minutes
Shoot cases: When CTs defend B / While offending CTs on the B site / After planting a bomb
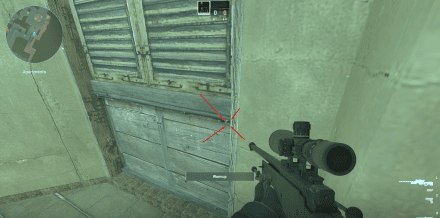
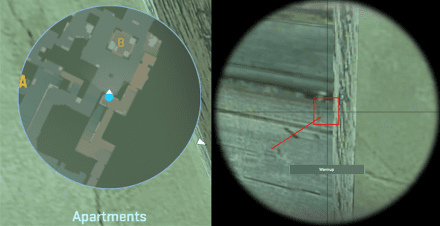
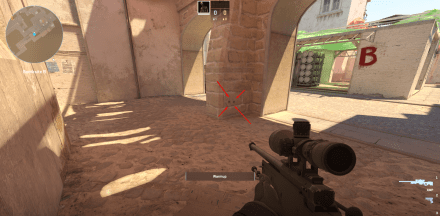
Apartments -> B Shop window
You can shoot the market window through another wall in the Apartments. Go just a little bit further past the window with shutters and stop in the right corner of the doorway right before the area with windows looking on the Bombsite B. The wallbang is right beside a stain on the wall.
Timing: Mid-game/end
Shoot cases: When CTs defend B / While offending CTs on the B site / After planting a bomb
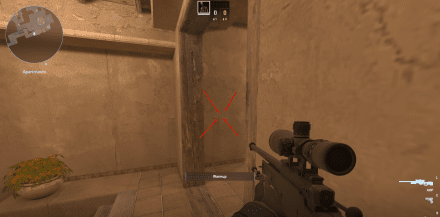
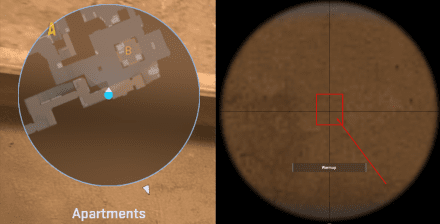
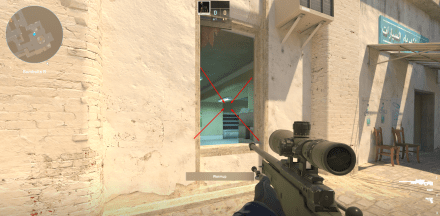
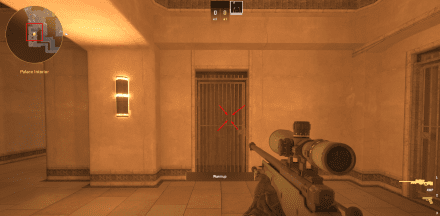
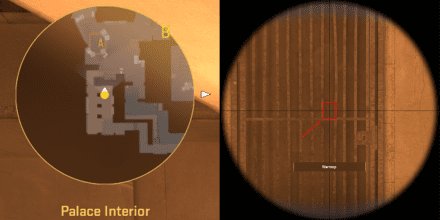
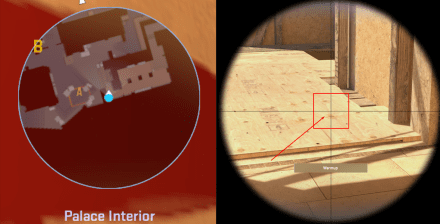
Palace -> Balcony corner
The shot goes right through the door, allowing you to potentially hit anybody squirming around on the scaffolding balcony just behind the corner. Works great as a safety shot when approaching A.
Timing: Toward the end of the match
Shoot cases: When CTs defend A / While offending CTs on the A site / After planting a bomb
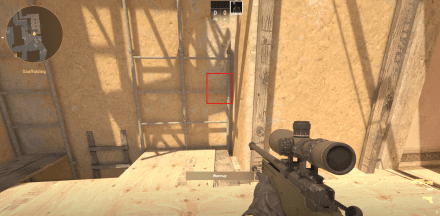
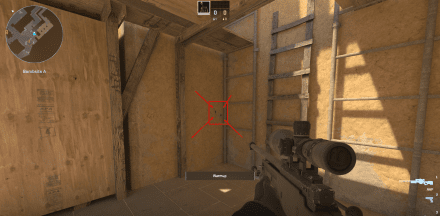
Palace -> Under Scaffolding
Use the Scaffolding wallbang to eliminate any CT campers hiding under the planks. This is a good spot to shoot “just in case” every time you pass the area, as there’s really no way to tell whether there’s a camper or not.
Timing: Mid-game/end of the match
Shoot cases: When CTs defend A / CTs camping under Scaffolding
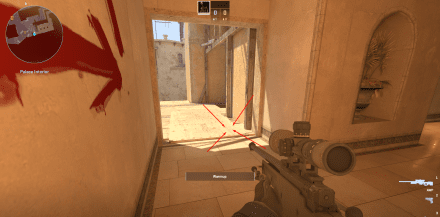
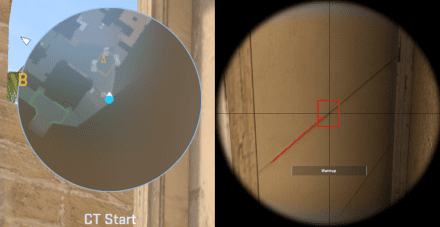
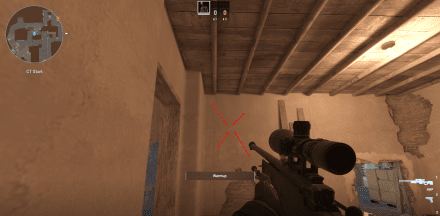
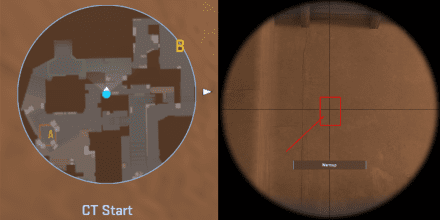
CT Start corridor -> CT Start
Approaching enemy spawn positions, you can take advantage of the corridor shoot-through wall to eliminate any foe moving from the spawn to B. It works especially well when there’s someone hiding on the blocks behind the wall.
Timing: End of the match
Shoot cases: Rushing A / Defending CTs at their spawn point / After planting a bomb
These wallbangs are very effective and will help you even if the opponent is constantly using cs2 mirage smokes to take positions unnoticed. Now, you can easily master all Mirage wallbang spots for CS2 to get an upper hand in your competitive play. Just don’t forget to use the directions above as your trusty Mirage wallbangs guide.

