CS2 Nade Binds
Contents

Becoming a truly successful CS2 player takes more than just sharp aim and quick reflexes. One well-placed smoke or incendiary can — and often does — decide the outcome of an entire round. But to land those game-changing throws, you need more than luck: it takes strategic thinking, solid team communication, and precise map knowledge to make sure your grenades hit the right spot at the right time.
So, how can you pull out a flashbang or an incendiary grenade in just one second? In this article, we will help you understand how to bind nades in CS2. With custom grenade binds in CS2, you’ll always have the utility you need — right when you need it.
Bonus tip: Want your grenades to fly farther and land exactly where you intend? Mastering the CS2 jump throw bind is a game-changer. You can create that — and many other helpful binds — using our CS2 bind generator tool.

How to Bind Grenades in CS2?
CS2 grenade binds are created using console commands, and there are three main ways to set them up. The easiest method is to adjust your keybinds in the in-game settings. For even better customization, you can also use the developer console. Alternatively, you can use a well-optimized CS2 autoexec.cfg file, which often includes the most essential commands and binds for smoother gameplay.
Via Setting Menu
Follow these steps to set up CS2 nades binds using the Setting Menu:
- Launch the game.
- Open the Settings menu.
- Navigate to the Keyboard/Mouse tab and scroll down until you find a list of all grenade types.
- Choose and assign a key to each grenade in the list based on your preference.

Via Console Commands
Setting up nade binds in CS2 from the command line is also straightforward. After enabling the console (Settings > Game > Enable Developer Console > Yes), press the “~” key, enter your command, and hit Enter.
Note: Console commands only apply to the current game session. To make them permanent, you’ll need to add them to an autoexec.cfg file. That said, console binds are a great way to experiment with different setups to figure out the ones that work for you.

Now, let's see what commands you need to enter for each grenade type.
Molotov
Molotov is a flame grenade available exclusively to Terrorists. This grenade can help you lower the enemy's HP or push them out of the zone. You can bind it with the following command (use the button you want to use instead of “key”):
bind "key" "slot10"

Incendiary Grenade
The incendiary grenade is a clear analog of Molotov available to Counter-Terrorists. Works similarly to flush out enemies or control space. To quickly equip this one, use the following command line:
bind "key" "slot10"

Smoke Grenade
A smoke grenade can limit the enemy's vision or hide you from hostile snipers during tactical maneuvers. It will be very useful to know CS2 smoke training commands can help perfect your throws. Pro tip: You can also use it to extinguish fire from the previous two grenades. To bind this grenade for quick access, enter the following command:
bind "key" "slot8"

Flashbang
Flashbang allows you to temporarily blind nearby enemies, disorienting them for a precious few seconds. To quickly get this must-have grenade, enter the command below:
bind "key" "slot7"

HE Grenade
HE deals explosive damage to the enemies caught in its blast radius. It is perfect for softening up enemies or finishing off low-HP opponents. To quickly reach for your HE, you need to add the following command:
bind "key" "slot6"

Decoy Grenade
This one allows you to mimic the sound of your most powerful weapon when thrown. It creates fake firing sounds to confuse opponents. To equip this grenade quickly, enter:
bind "key" "slot9"

If you want to instantly try out any gun in the game, using CS2 weapon commands is the fastest and easiest way.
Saving and Applying Binds Permanently
To make your binds stick after restarting the game, save them in an autoexec.cfg file. Here’s how to make an Autoexec in CS2:
- Navigate to
Steam\steamapps\common\Counter-Strike Global Offensive\game\csgo\cfg Create or edit the file named
autoexec.cfg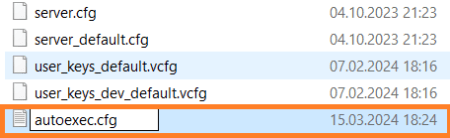
Add your binds to the file:
In Steam, right-click CS2 > Properties > Launch Options, and add:
+exec autoexec.cfg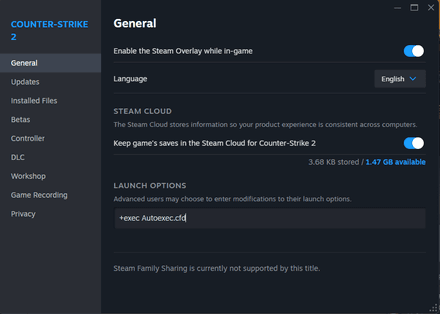
- That’s it! Now, your binds will now load every time you start the game.


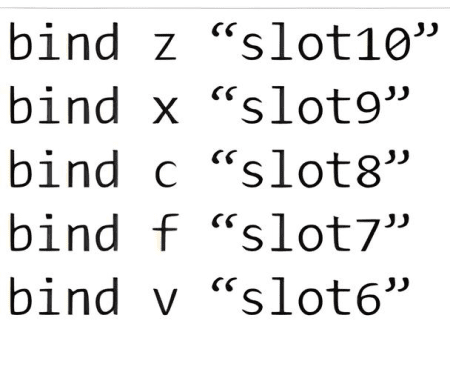
Best Keybinds for Grenades
If you want to bind nades in CS2, you need to allocate at least five keys to them. For quick access, the best decision is to use keys close to WASD. Most CS2 players recommend "C" for smokes, "Z" for Molotovs/Incendiaries, "F" for flashbangs, "X" for decoys, and "V" for HEs.
You can also bind grenades in CS2 for mouse buttons, which is ideal for faster reaction times. Choose keys based on your role — entry fraggers may prioritize flashbangs, while support players might focus on smokes and mollies.
Grenade Type | Command | Recommended Key |
Molotov/Incendiary |
| Z Mouse 4 (Side Button) |
Decoy |
| X |
Smoke Grenade |
| C |
Flashbang |
| F Mouse 5 (Side Button) |
HE Grenade |
| V |
Troubleshooting Nade Binds
Binds Not Working Properly
If your grenade doesn’t equip when pressing the assigned key, your settings may have been reset. Reapply them through the settings menu or autoexec to ensure the keybinds are permanent.
Key Conflicts with Other Functions
If a key is assigned to multiple actions — for example, “C” might be set to both crouch and throw a smoke — one function may override the other. Clear the old bind before applying the new one, via the following command combo: unbind "c"; bind "c" "slot6".
New Binds Are Inconvenient
If your keybind setup feels clunky or confusing, or you just want to start fresh, resetting all binds is the fastest fix:
- Go to Settings > Reset to Default, or
- Use this command in the developer console:
exec default.cfg
Note: This will reset all your settings — not just keybinds.
Conclusion
Now you know how to set upCS2 nade binds. If you’ve played Counter-Strike for more than a few hours, you know that sometimes, even the slightest delay can cost your team a round — or even the entire match. That’s why mastering CS2 grenade binds is key to improving your performance. With the right setup, you’ll react faster, coordinate better, and dominate your next game with ease.


