How to Play Workshop Maps with Friends in CS2
Counter-Strike isn't just about the official maps and competitive modes; it's a thriving hub of community-created content made by passionate players. From the earliest days of the game, there have been tons of custom maps, offering fresh twists on gameplay, providing training grounds for new skills, or simply showcasing the creativity of the modders. Valve recognizes this is a vital part of the experience.
Custom maps and user-made content have been a huge part of their games, and in CS2, they've made it even easier to dive into the world of workshop maps, pushing the boundaries of what players can create and enjoy.
But anyway, can you play workshop maps with friends in CS2? Like, actually play and enjoy? Fortunately, it’s straightforward.
In this guide, we’ll walk you through the process of how to add workshop maps to CS2, discuss all of the intricacies, and answer any questions you may have. We will also check out a couple of methods that will show us how to play a workshop map with friends in CS2. So, let’s get started!
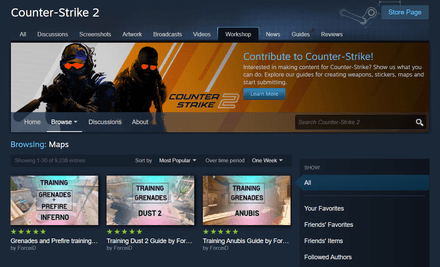
How to Find Workshop Maps
So, how to play custom maps in CS2? The whole process is generally simple and intuitive, and knowing how to get workshop maps in CS2 will unlock a whole new world of Counter-Strike.
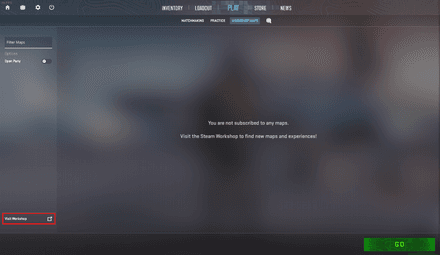
The first step in exploring custom maps is getting into your Steam Workshop. You can access it from the game itself through the overlay:
Click Play > Workshop maps > Press Visit Workshop.
You will be greeted with a Steam Overlay screen displaying the Counter-Strike 2 Workshop page. Here, you can browse a wide variety of downloadable maps and items to add to your subscriptions. You can either use the search bar to look for specific content or scroll down through the most popular maps to find something that catches your eye. Among them, you can already find the best CS2 parkour maps to practice your skills.
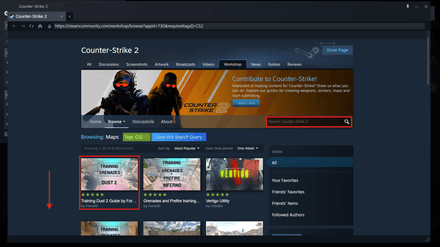
An alternative way to download them and put your finger on how to play workshop maps in CS2 is to access the Workshop through your browser or the Steam app:
Open Steam, click on Community in the top menu, and select Workshop from the drop-down menu.
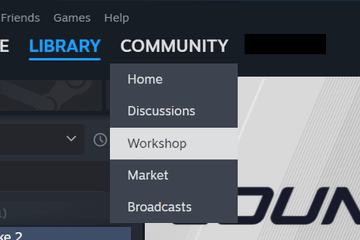
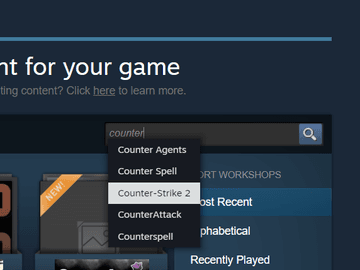
Next, type in Counter-Strike 2 in the search box in the top-right corner and click on the game name from the results.
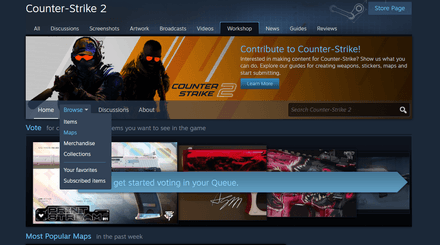
Once you’re in the CS2 Workshop, hover over the Browse button and select Maps from the dropdown menu. This will display a list of all available options.
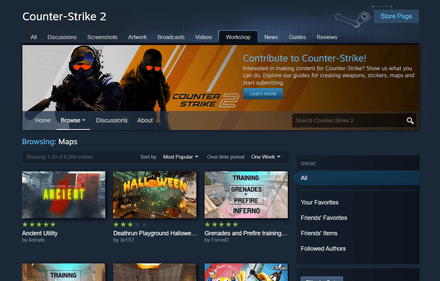
From there, you can either search for something specific that interests you or apply filters to narrow down your options. This is especially helpful if you’re unsure what to install or are looking for maps tailored to a particular game mode.
How to Download Workshop Maps
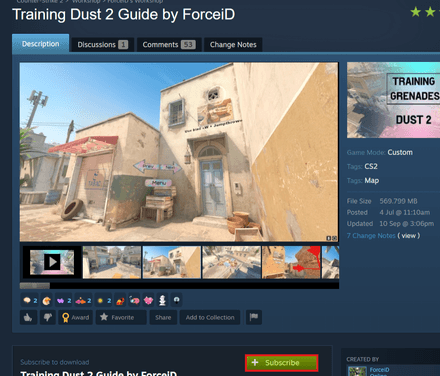
Let’s see just how easy it is to learn how to play custom maps in CS2. Just click on the one you like, scroll down the page, and click the big green "Subscribe" button. That’s all it takes! The map will automatically download and will be ready for use in-game. To access it, open CS2 and navigate to Play > Workshop maps from the main menu. We’ll explore an example of this process in a later section.
How to Run a Downloaded Workshop Map
After hitting Subscribe, you will have to be a little bit patient as the map downloads onto your PC. Depending on the size of the map, this may take a few minutes. Once the download is complete, you may need to restart CS2 for the map to show up in your Workshop Maps list. For example, if you’ve subscribed to the “Training Dust 2 Guide by ForceiD” map, simply restart the game, and it should to appear on the Workshop Maps page section under Play in the main menu.
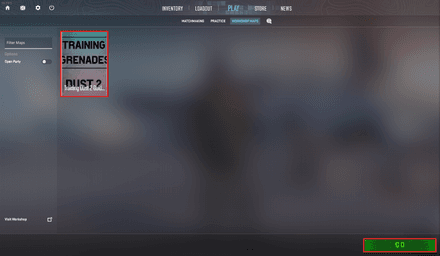
As soon as the map appears, and you've clicked on the Go button to launch it, you'll be the only player on the map. But to play with friends, you’ll need to set up a few things to get started.
How to Play Workshop Maps with Friends in CS2
Well, now that you know how to download and run Workshop maps, let’s go over how to play CS2 workshop maps with friends. Let’s take a look at what you need to do.
For both methods, you will first need to create a lobby in CS2. This allows you to invite your friends and play together on the custom map you’ve downloaded:
- Install a Radmin application to create a local network.
Create a network.
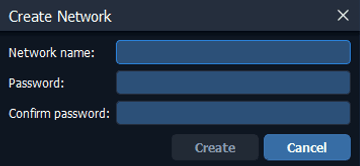
- Have your friend/friends install the app.
- The app will give you an IP address for everyone. Make sure to note down your own IP address.
- Load up your Counter Strike 2 workshop map as you did before.
Tell your friends to open their console by pressing the ~ and type “
connect <your IP address>”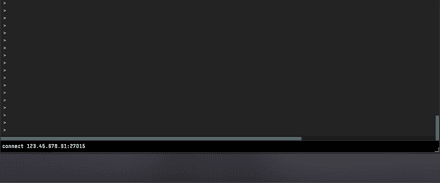
By the way, map "aim_botz" is one of the most popular in the workshop, and now you know how to play aim botz in CS2.
There’s also an alternative method to play CS2 workshop maps with friends in case you/your friends prefer not to download anything, or if the first method doesn’t work. This approach is a bit more involved and requires the host (the person starting the server for the workshop map) to have dynamic IP (Moderate or Open NAT-Type) and access to their router’s admin settings.
Here’s what the host needs to do:
First, open the command prompt on your PC by pressing Windows+R and typing '
cmd.' Then, typeipconfig /alland press Enter.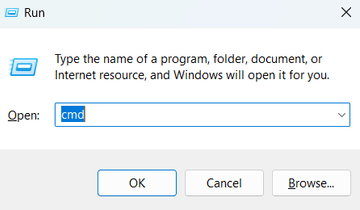
You'll see several rows of information. Look for the section with an active internet connection, which is the one you'll be using to create a server. This is usually the section that has the most rows.
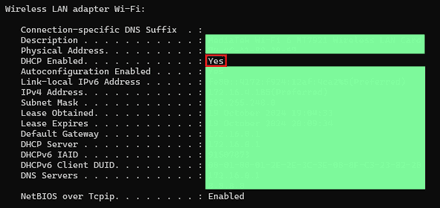
Next, check whether the DHCP Enabled corresponds to Yes:
- If it says yes, your internet provider is likely assigning a Dynamic IP to your devices, and you can freely proceed with the guide.
- If it says No, it’s most likely a Static IP, and this method won’t work.
In the same section (for example, Wireless LAN adapter Wi-Fi, but it could also be Ethernet), you'll see several other rows and numbers.
Make a note of the Default Gateway and IPv4 addresses for later use.
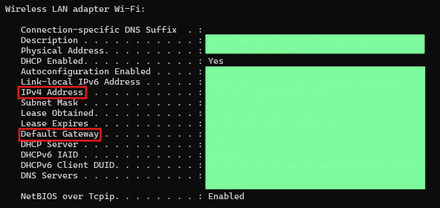
Now, enter the default gateway into your browser's URL bar. This should open your router’s interface.
You’ll be prompted to log in. The default login credentials are typically both set to 'admin.' If that doesn’t work, check the back of your router for the correct login details.
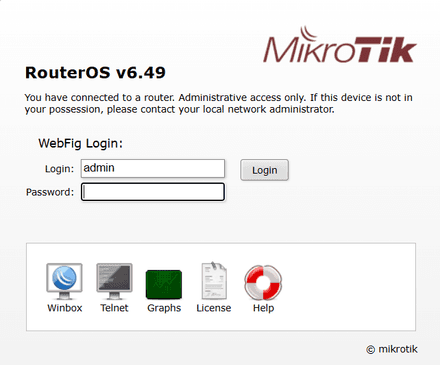
Find the section for port forwarding (often located in Network Settings > NAT, but it may vary depending on your router model).
Create a new port forwarding rule and give it any name you prefer.
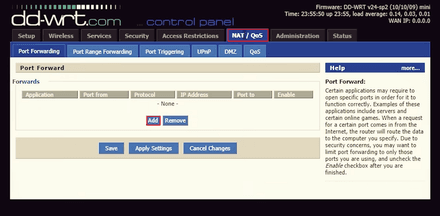
- In the Start Port field, enter 27015, and in the End Port, input 27016 – these are the standard ports used for CS2.
For the Server IP Address, enter the IPv4 address you saved earlier. Select TCP/UDP as the protocol.
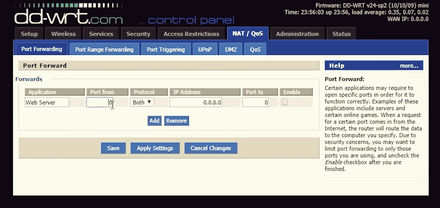
Enable the rule by setting it to active and saving your changes.
Once the ports are forwarded, you'll also need to allow them through the Windows Firewall.
Open Windows PowerShell as an administrator and enter the following commands one by one, as the PowerShell only processes them individually:
- New-NetFirewallRule -DisplayName "CS" -Direction Inbound -LocalPort 27015,27016 -Protocol TCP -Action Allow
- New-NetFirewallRule -DisplayName "CS" -Direction Inbound -LocalPort 27015,27016 -Protocol UDP -Action Allow
- New-NetFirewallRule -DisplayName "CS" -Direction Outbound -LocalPort 27015,27016 -Protocol TCP -Action Allow
- New-NetFirewallRule -DisplayName "CS2" -Direction Outbound -LocalPort 27015,27016 -Protocol UDP -Action Allow
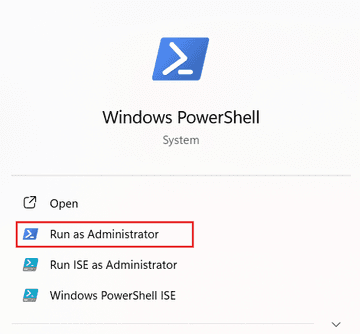
This will ensure that connections through these ports are allowed by the firewall.
Once you've completed these steps, others should be able to join your game. If they can't join through the lobby, they can use your public IP address to connect via the developer console.
- To find your public IP, simply search "What is my public IP?" in any browser. Be sure to only share this IP with trusted individuals.
When sharing your public IP, append it with:27015 (e.g., 123.45.678.91:27015) and provide that to your friends. They can then join by entering the following command in their console:
connect <IP>:<PORT>.
Hopefully, now that you know how to play custom maps with friends in CS2, you’ll have no issue hosting or gaming in the match. Enjoy the game and good luck!

