How to Start a Twitch Stream: Beginner's Guide
Contents
Despite the modern media clearly favoring a short format right now, e.g., TikTok, YouTube Shorts, and Instagram Reels, longer forms like video essays or streams still seem to attract a sizable audience. Interacting with followers while playing a game can also expand the streamer’s fanbase, making platforms like Twitch and YouTube important tools for any online career. If you chose the second option between the confrontation of popular streaming services YouTube vs Twitch, then this article is for you. Throughout it, we’re going to explain how to start a Twitch stream of your own, even if you've never done it before, and discuss all the preparations and potential issues you should be ready for.
As we’re a dedicated Counter-Strike 2 digital library, our Twitch setup guide will mostly focus on CS2. This means we won’t pay much attention to streaming on gaming consoles like Xbox or PlayStation.
What Do You Need to Start Streaming on Twitch?
Let’s start with some basic things you need to set up a Twitch stream and go live. Of course, the list includes a computer or laptop, streaming software, and a stable internet connection.
Hardware
That’s the trickiest part in the block, as there’s no single golden formula for an optimal stream set-up.
Computer & Monitor
You should first decide whether you want to run the stream on a parallel PC/laptop or on the same one you’ll be playing. Logically, for the second option, you’ll have to make sure your hardware can handle both your Twitch streaming setup and the increased load of CS2’s new graphic engine.
However, the basic requirements for Twitch streaming aren’t exactly sky-high:
- 4 cores 8 threads CPU (Intel Core i5 or AMD Ryzen 5);
- 8 GB RAM;
- Graphics card GTX 1050 Ti/RX 560;
- 256 GB SSD.
With this setup, you should be able to comfortably connect a video/web camera and microphone, as well as adjust chat, donations, and interactive pop-ups.
However, if you’ve come here wondering how to set up a Twitch stream and play CS2 on the same PC, you should refer to these requirements instead:
- 8 cores 16 threads CPU (Intel Core i9 or AMD Ryzen 9);
- 32 Gb RAM;
- Graphics Card GTX 4070 Ti or RX 7900 XT;
- 1 Tb NVMe SSD.
With those (quite impressive) specs, you can get 150 FPS and full-HD streaming quality. As for the monitor, having an additional one is a must if you want to manage the stream without constantly opening and closing the game.
Camera
You simply can’t become a successful streamer without showing your face to the public, both proverbially and literally. Most Twitch viewers arrive at the platform seeking some real emotions, like when you make an ace or get knifed.
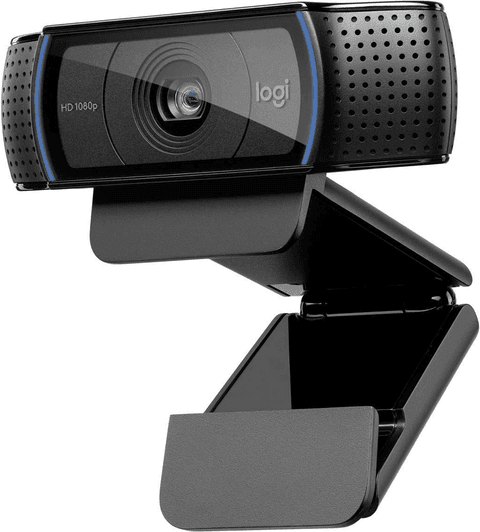
So, you’ll need a decent web camera with Full HD (1080p) and 30+ FPS. Something like Logitech HD Pro C920 will do the trick at just around $30.
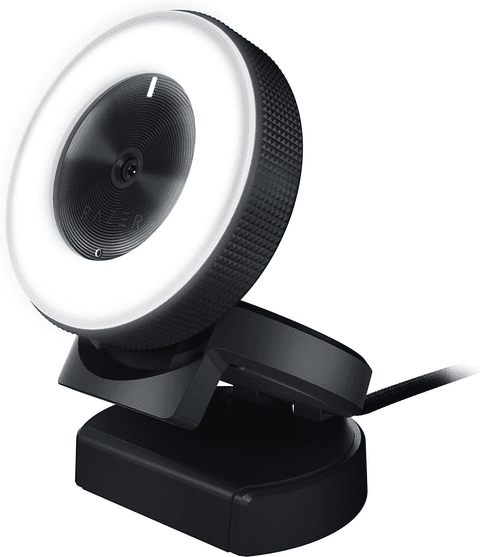
Choosing the one with a higher FPS (up to 60) and in-built lighting, like Razer Kiyo, will cost a bit more but provide even better quality.
Microphone
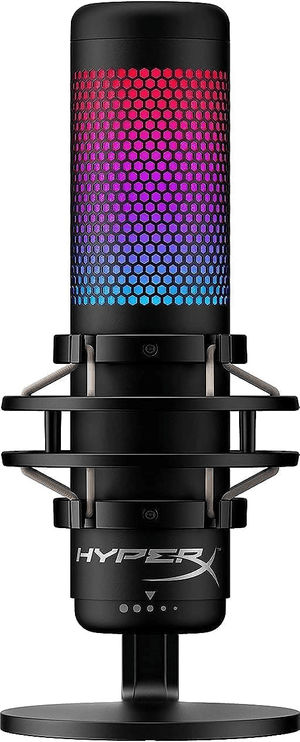
Choosing a high-quality microphone is just as important as having a good camera. The HyperX QuadCast S, which costs around $100, is a decent starting option with good sensitivity, a built-in pop filter, and RGB lighting.
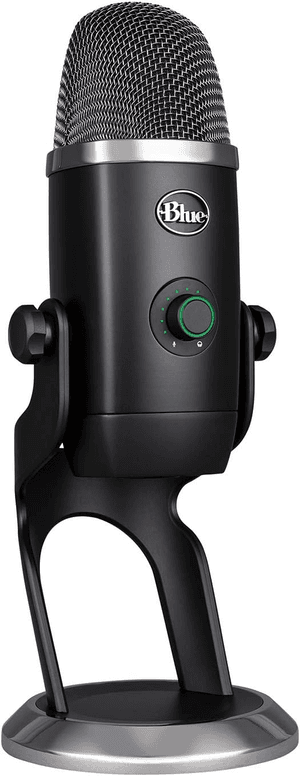
If you need a better sound quality or don’t fancy all these glowing lights, you can instead go for Blue Yeti X, which will usually cost you about 40% more.
After choosing the best streaming microphone for your specific needs, let's move on to the next step.
Internet Connection
The basic internet speed requirements are pretty low, with 5 Mbps recommended for HD video and up to 25 Mbps for 4K. However, you should also add the internet speed required by the game itself (around 5 Mbps) and double those digits if you want to avoid any lags. By the end of the day, to comfortably stream CS2 on Twitch, you’ll need at least 50 Mbps.
Preparing and Adjusting the Stream
So, you have all the necessary hardware, a cool stream idea, and a burning desire to go live. Still, there are some more preparations to make before setting the course for Twitch's live page.
Choosing Your Streaming Software
Those who don’t know how to go online on Twitch can be overwhelmed by the variety of available software. We suggest you try the two most popular options on the market and decide what you need from there:
- OBS Studio;
- Streamlabs.
Let’s review their pros and cons so you can make the initial choice.
OBS Studio
The Open Broadcaster Software (OBS) is the most popular option of how to stream on Twitch. It is a free solution with a huge community and an open-source approach, and can offer you the following advantages:
- A free tool with open code and regular updates.
- No watermarks or similar limitations.
- Adjustable interface, including audio mixing.
- Screen capture (with the ability to save the stream).
- CPU-friendly.
- Multiplatform (YouTube and Facebook Live) and Multi-OS compatibility (Windows, macOS, and Linux).
As you can see, there are more than enough reasons to use OBS Studio. However, it has some disadvantages you should be aware of:
- No multistreaming.
- Limited amount of plugins.
- Confusing old-school interface.
Good functionality and reliability make OBS an excellent choice for beginners. However, if you plan to stream on platforms other than Twitch, this isn’t the app for you.
Streamlabs
Many guides regard Streamlabs as the best way to stream on Twitch, and for a good reason. It has a user-friendly interface and some impressive features available for a paid subscription. Overall, Streamlabs' advantages are as follows:
- Easy setup process.
- Adjustable stream windows, including live chat.
- In-built monetization options.
- Ability to stream via phone.
If an app has both free and paid subscription models, one should always expect serious limitations:
- Watermark and only 480p quality in the free version.
- A lot of options aren’t available in the free version (limited number of cameras, branding overlays, audio effects, no preload videos, and multistreaming, etc.).
- Comparatively higher CPU load.
To be honest, the majority of modern-day streaming software will only work for you after you throw some money at it (usually $5 or $9 per month), and Streamlabs is definitely not the worst one of the bunch. If you don't mind spending a little extra cash, this app is an excellent choice due to its fast and clear setup process.
Configuring Your Stream
Regardless of the software you have chosen for your Twitch setup, you should start by installing the app and adjusting audio and video settings. OBS and Streamlabs have relatively similar installation procedures and configuring instruments, so let's briefly discuss them.
Installation and Linking to Twitch
First, install OBS Studio or Streamlabs Desktop and launch it.
Then, for Streamlabs:
Confirm the audio and video devices you plan to use, and choose your creator profile type.
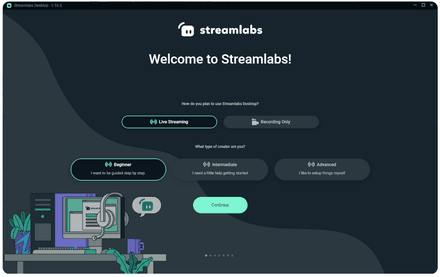
- Create your Streamlabs account and link it to your Twitch profile.
Link your OBS profile and settings (optionally).
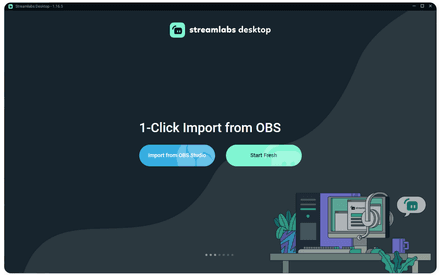
For OBS studio:
- Set up General aspects like language, overlay, basic confirmations, etc.
Choose Stream server and service, and connect the app via a key.

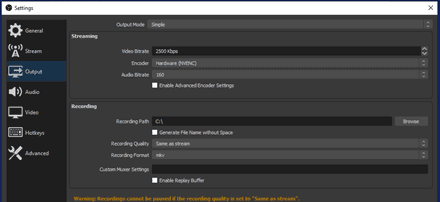
- Adjust all the necessary Output elements, including bitrate, quality, save folder, video format, etc.
The rest of the settings will be similar to both apps.
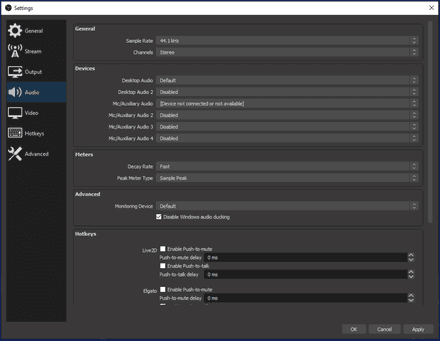
Adjusting Audio
In the Audio settings, you can choose the volume mixer, microphones, quality, and more.
Setting Up Video
The Video tab is just as simple, with only a few basic elements like a resolution for Canvas and output, FPS for the camera, and a downscale filter.

Advanced Settings
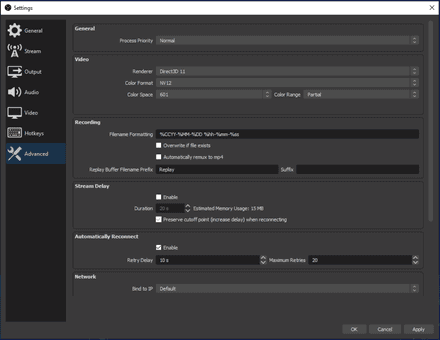
Advanced settings aren’t all that complex either, but some may require special attention. For instance, the rendering type should have the appropriate version (DirectX 11) and an NV12 color format. Delay is also extremely important for streaming Counter-Strike 2 if you’re worried that your opponents will find your stream and use it as a sort of wallhack (are you surprised this actually happened several times?). We suggest you set it to 30 seconds, just to be sure.
Designing Your Stream Layout
Although layout design is not necessarily the most important topic in Twitch streaming for beginners, you should still pay adequate attention to it. Of course, you should feel free to customize your streams however you like, but there are a few guidelines you should keep in mind:
- Don’t overdo additional windows. Having more than 2-3 can make your stream look messy.
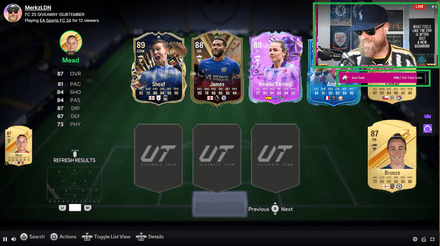
Choose an appropriate location for the additional windows, especially for your camera. The rule of thumb is that you want your viewers to see the content clearly, no matter what. The screenshot below shows how locating the major layout in the upper-right corner can ruin the stream.
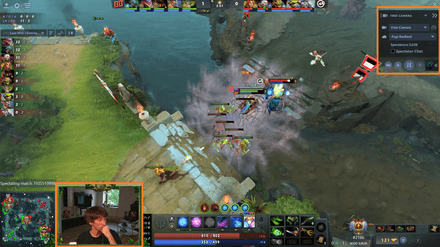
If you are watching a game on your stream (that is, if you are popular enough to do comment/reaction content), try to limit yourself to just one or two additional windows. Here’s how a popular Ukrainian Dota 2 player, “Dendi,” decided to organize a commentary stream.
- Don’t forget about alerts, and be free to experiment with them. You can start by selecting a melody and GIF to appear each time you get a new subscriber; later, it can be tweaked to show for top chat participants or goals achieved during the stream (amount of online viewers, donations, etc.).
- Choose appropriate colors and backgrounds for layouts so they won’t blend with content.
- Experiment with layout software. For example, the absence of the chat in OBS can be a serious obstacle if you want to show your viewers' activity.
Live Streaming Specifics
Now we’re clear on how to set up Twitch, let’s talk about what else you’ll need before going live.
Preparing for Your First Stream
Besides all the technical elements and their testing, you’ll also need a general idea or even a scenario for the stream.
If you want to stream CS2 on Twitch, you should think about the following:
- Approximate launch time and overall time of the stream (When will your potential target audience watch it? How long will you be active during the stream?).
The major topic of the stream:
- Playing MM/FACEIT/Deathmatch (by the way, the last option will allow you to better interact with your audience);
- Case opening (popular topic, and can be posted on YouTube later);
- Giveaway (should be properly advertised; it’s better not to risk with it in the beginning);
- Watching live competitive matches or other game-related videos;
- Other specific topics (tutorials, training, community maps, and modes review, etc.).
- Create a scenario for the stream with approximate timestamps.
- Prepare to encounter toxic behavior in the chat and decide how you want to deal with it (using moderating instruments, going angry, aggressive responses, ignoring — all approaches can work).
- Don’t forget to thank your viewers for every subscription or donation.
- Keep in mind that the stream should be recorded and later uploaded on YouTube (including Shorts) or TikTok to attract additional viewers and raise brand awareness.
The most important thing you’ll need during your first stream is confidence. Any previous experience with public speeches or theatrical performances will be a huge help here.
Starting Your Stream
The process of setting titles and choosing categories and tags is pretty similar across all the streaming apps that Twitch supports. There might be some slight variations, but you’ll surely receive pop-ups explaining those. So, let’s discuss these settings in broad strokes.
Your Twitch title should be short and catchy to immediately grab your audience's attention. “Destroying s1mple on Faceit online,” “Knife Giveaway for subscription,” or “CS2 case opening until catching a knife” are all examples of good naming.
Your Twitch category is, well, gaming. Despite Twitch being a gaming-dedicated platform, there are also categories like music, art, animals, ASMR, talk shows, traveling, and many more.
Your Twitch tags are probably the most complicated element of pre-launch preparations, as you can choose up to 10. Unfortunately, tags aren’t automatically translated into users’ preferred languages, so if you want to focus on, let’s say, a dog presentation, you should add the word “dog” in several languages. For more details and specifics, go to the Twitch setup guide page.
Engaging with Your Audience
Figuring out how you’re going to interact with your viewers is another important element of pre-stream planning. There are several tips for Twitch streaming we can offer you.
- Be active during the stream. Maybe some people will love your stream if you stay focused on the game and destroy opponents, but the majority come to see and hear your emotions and reactions.
- Keep attention on chat. You should aim to respond to as many messages as you can (yes, even the annoying ones). It’s better to reply with a joke than not to reply at all.
- Provoke chat activity. Use built-in voting or simply ask questions. It works even better if you’re facing an in-game dilemma, and viewers can help you resolve it.
- Catchy overlays and pop-ups. A funny video or GIF appearing on the screen after every donation or subscription encourages viewers to activate it more often.
- Fair Giveaways. People love free stuff, and giveaways can be a great strategy to attract a new audience. But remember, it’s better to give away a few cheaper rewards than make a lottery for a single expensive prize.
Common Issues and How to Deal with Them
When learning how to Twitch you will surely face some issues, so we prepared a list of the most common ones and the ways to solve them.
Technical Problems
Streaming Software doesn’t see a camera, microphone, capture card, or audio mixer
- After plugging it in and installing drivers, some hardware may simply require resetting your PC for driver synchronization.
Also, make sure that your streaming app has access to your microphone and camera:
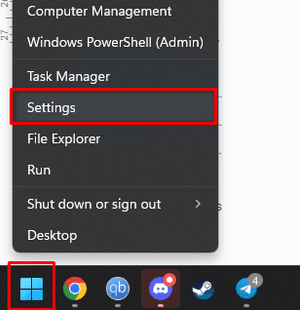
Right click on Start and choose Settings;
Go to the Privacy and Security tab and select Camera/Microphone;
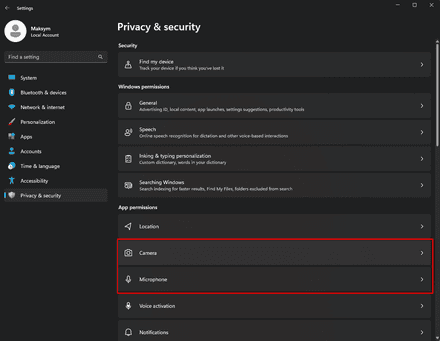
- Check if your streaming app has permission to use it.
Stream is blocked by in-built protection programs
- Try deactivating your firewall and turning off antivirus (or add your stream software to the exclusion list).
The stream is lagging
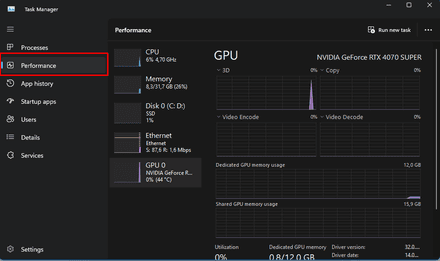
- Check your internet connection speed and your adapter load (via task manager) or choose lower stream settings (downgrade video quality, turn off some layouts, stop recording and saving it).
Trolls and Negative Comments
You should learn the moderation specifics of Twitch almost by heart, as it will arm you for combating inappropriate messages. The platform has bots that can block most harassing words automatically, but you can also moderate the chat manually or even hire a team of moderators if your channel is popular and profitable enough.
In short, here are your options:
- Automatic moderation;
- Personality verification (allow only verified users to enter your chat);
- Chat rules (set up your own list of requirements to create the kind of community you want);
- Delay between messages to prevent spam;
- Block suspicious messages and hyperlinks;
- Dedicated audience (chat is available for followers and/or subscribers only).
This should filter most negative and abusive messages, but some of the job will have to be done by hand. Remember that you can permanently ban annoying users if they try to abuse you or simply bring too much negativity to the conversation.


