Dota 2 Ping Location Guide
Effective communication is a key part of any successful strategy in Dota 2. And when every second counts, you may be too focused on the game to express your thoughts via voice chat properly. That’s where the Dota 2 ping comes into play!
Gamers use this tool to share information and coordinate their actions quickly. Keep reading to learn more about this important, oft-misused, and regularly abused feature.
What are Pings in Dota 2?
Players can use pings in Dota 2 just as in any other MOBA: to draw their teammates’ attention to in-game events and suggest strategic moves. Currently, this is the fastest way to communicate during the match, as it takes way less time than explaining your strategy via voice chat or text messages.
Simply clicking on the map, an enemy, or an object lets you quickly share information or highlight your planned course of action. This feature is available in both Public and Matchmaking games. However, there are some limits that depend on your communication score:
- If your score is lower than 10,000, you can’t ping your teammates’ items and abilities.
- If your score is under 3,000, you’ll have to deal with a 30-second cooldown between pings.
Types of Pings in Dota 2
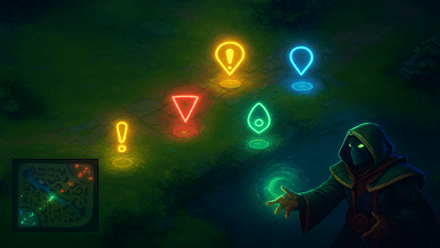
There are several pings available in the game, easily differentiated by their visual effects. The list below provides an overview of the main ping types and their applications.
Ping Type | When to use it? |
Exclamation | To draw your allies’ attention to a location/event on the map |
Cros | To suggest withdrawal or stop an ally from performing a certain action |
Shield | To request your allies’ help in defending a certain location |
Swords | To plan the attack on Roshan, an enemy hero, or a building |
Enemy Vision | To inform your team about the enemy Observer Ward and/or Sentry |
Ally Vision | To suggest placing an Observer Ward and/or Sentry |
Heart | To cheer up or thank your teammate |
On my way | To inform your team where you’re going |
Assist | To ask for assistance |
Caution | To warn your teammates about a possible danger. |
You can adjust your map awareness by pairing this guide with our Dota 2 minimap settings and tips for clearer pings and faster reactions.
How to Ping in Dota 2
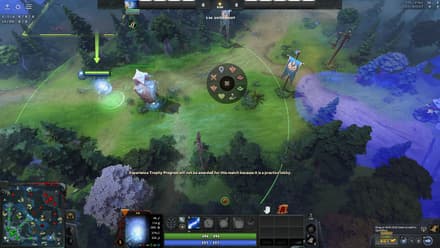
To ping locations in Dota 2, hold Alt + Left Click to open the Ping Wheel and select the appropriate option by hovering your mouse over it:
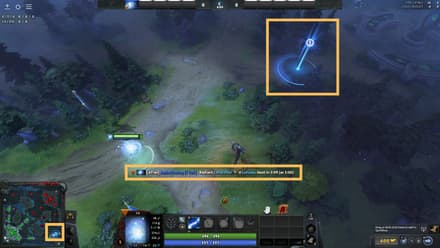
By clicking on a ping wheel option, you’ll immediately activate the corresponding ping. It’ll be visible both on the main screen and the minimap. Additionally, a ping message will be displayed in the chat (visible only to your allies):
Alternatively, you can bind up to pings to any key of your choice. As a rule, Exclamation and Cross are the best options here, as these are the most useful pings in the game. Find the Settings Menu, enter the “Communication” tab, and choose “Ping Wheel”. There, you’ll see the ten pings, which you can allocate between the wheel (up to 8) and two keybinds:
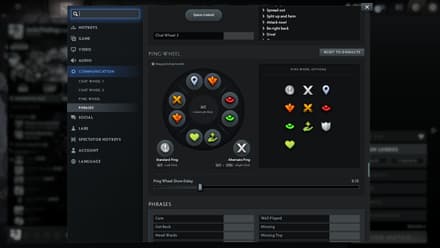
To activate your main quick ping, simply use Alt + Left Click (without holding it). An alternative ping is activated by pressing Left Ctrl + Alt + Left Click.
When learning where to ping for danger or objectives, it helps to use a Dota 2 ward placement map to understand vision around your callouts.
How to Use Pings for Team Communication
Custom ping locations in Dota 2 are often more effective than any words, especially when it comes to team fights. For example, imagine your allies have killed 4 out of 5 enemies, but the last one has escaped into the forest. Using pings, you can suggest where the last opponent may be hiding, which is much faster than trying to explain it through voice chat. This way, you improve your team’s chances of finding the enemy before they use a Town Portal Scroll.
There are numerous other situations where proper pinging can save the day. Using this tool, you can suggest the best ways to retreat, avoid ganks, or help your supports pinpoint the location of enemy wards.
Good ping discipline also supports your progress from how to increase communication score in Dota 2.
Conclusion
Using custom pings in Dota 2 is a great way to simplify your communication with your team. Regardless of the language you speak, your allies will always be able to quickly understand what you mean. However, keep in mind that excessive pinging may reduce your communication score. So, ping responsibly.
