Dota 2 Map Positions: Key Locations and Strategies
Contents
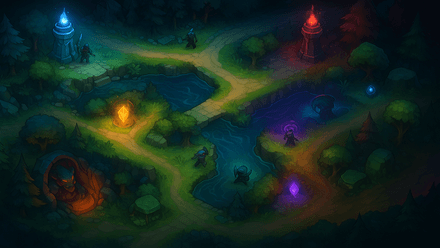
Map mastery is a must for any player looking to level up their gameplay in Dota 2. Every lane, jungle area, and objective helps shape a team’s strategy, and getting a firm grip on your Dota positions and other key locations can have a huge impact on both novice and expert performance.
This guide will break down lane-specific strategies, jungles and neutral creeps, vision and warding, map control, and objectives—everything you need to tear through your enemies and take control of the battlefield. Positioning on the Dota 2 map for beginners might seem difficult first, but with this guide, you’ll have all the essentials to build up your knowledge and put it into action.
Basics of the Dota 2 Map
Understanding the Dota 2 map isn’t something to brush off. Countless aspects evolve throughout the match, which can grow into a powerful snowball that carries over to the end of the game.
Radiant vs Dire
While the Radiant and Dire sides might seem symmetrical like mirror images, each offers unique strengths and challenges.
Radiant is all about safe farming and vision control. With easy access to jungle camps and defensive buffs, Radiant cores can scale into the late game more smoothly. Features like Stalwart Statues, which provide +2 armor, and Well Wishes, which boost mana regeneration, allow Radiant heroes to sustain themselves better while they rack up farm.
Dire, on the other hand, dominates when it comes to Roshan control and aggressive positioning. With Mighty Mines providing +7 HP regeneration per second, Dire heroes can bounce back much more quickly after fights, making it an ideal fallback point for sustaining through the mid-game. The Skeleton Strength area, which grants a +5 attack damage bonus, further speeds up Dire’s ability to farm stacks and enables early objectives. However, Dire struggles with predictable warding spots, making it easier for Radiant to deward and control the map, providing a significant gold boost for Radiant. On top of that, Dire's jungle is more compact, making it susceptible to enemy invasions and smoke ganks.
Safe Lane
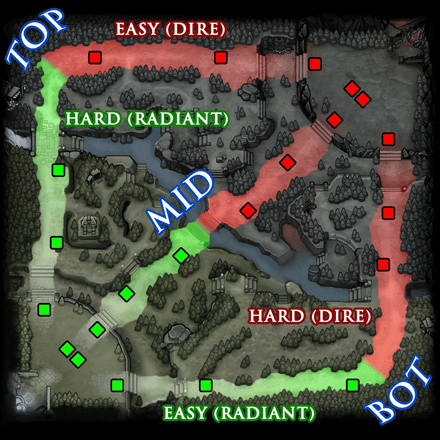
The Safe Lane can perhaps be considered synonymous with the Easy Lane due to the smoother access to that lane on both sides. The most obvious Dota 2 positions for this lane are Position 1 (carry) and Position 5 (hard support). The goal is simple here—farm up and ensure that the carry player remains safe and earns as much gold and experience as possible. The carry must take extra care to last-hit creeps rather than incur any risk.
Offlane
The Offlane, often called the Hard Lane, is the most challenging one due to its positioning closer to the enemy’s safe lane, making it harder to secure a farm without pressure. The typical Dota lane positions for Hard are Position 3 (offlaner) heroes, typically paired with a Position 4 (soft support). The goal of an offlaner is not just to survive but to disrupt the enemy carry’s farm, apply pressure, and contest creep waves.
Mid Lane
Mid Lane is the most isolated and skill-heavy lane in Dota 2, usually a one-on-one battle between two heroes looking to gain an edge in levels and farm. Unlike the side lanes, mid is closer to both power runes and neutral camps, allowing players to recover, sustain, or get aggressive based on the rune spawns. Mid players are responsible for dictating the game’s tempo, whether through early rotations, pressuring enemy lanes, or securing key objectives. Because of the short lane length, last-hitting and denying become an art, with every creep wave influencing who reaches level 6 first and who can establish dominance on that lane and/or exert map pressure.
Key Locations on the Dota 2 Map
Key locations are integral in Dota 2 and can help in controlling objectives, gaining vision, and confusing opponents. Each area has its strategic importance, and understanding how to use each of them will give your team a real edge.
River
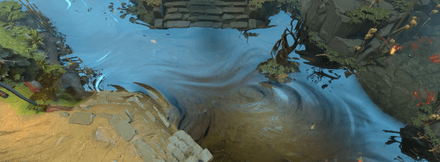
The River is an important feature in the Dota map that divides the Dire and Radiant sides. Functionally, it is a common passerby for rotation and rune control. The power runes would also spawn near the River every two minutes, offering buffs such as Haste, Double Damage, Invisibility, and Regeneration. Control of the River can assure the availability of these powerful runes for your side, which might shift the balance in battle or allow you to secure multiple kills during a gank. Thus, having a vision in the River is essential to see off enemy movements to avoid being ambushed.
Roshan Pit
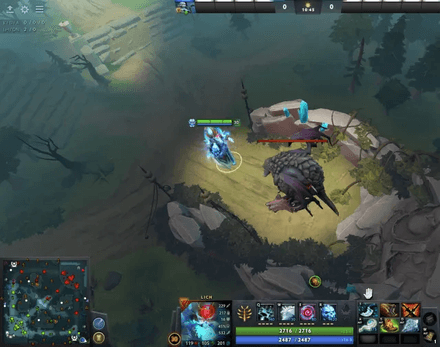
Roshan is the most powerful neutral creep in Dota 2 granting a powerful gift of extra life, and has long become an eternal battleground of the Radiant and Dire. Other than the Aegis of the Immortal, it also drops an Aghanim's Shard and a Refresher Shard closer to the end of the match, thus adding even more strategic advantage.
Teams controlling Roshan Pit gain control over the game and can decide when to fight or opt for high-ground pushes. Therefore, vision around the pit becomes crucial as it allows your team to prepare for Roshan attempts or catch the enemy off guard. Smoke of Deceit is often used to avoid detection when going to the pit, especially with the enemy having secured map control.
Outposts
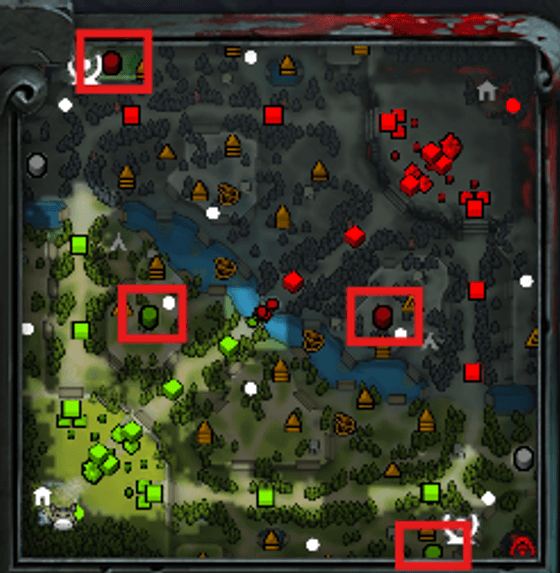
Outposts are Dota 2 map positions that are found in the jungle of both Radiant and Dire sides. These facilities grant vision, teleportation points, and extra experience rewards upon capture, which is very beneficial concerning map control and mobility. Late in the game, Outposts become extremely useful for blinding quick rotations and offering vision into essential areas. Most of the teams prioritize taking over Outposts right after bringing down Tier 2 towers as it opens the map up and applies pressure on the enemy, expanding their control.
Bounty Runes
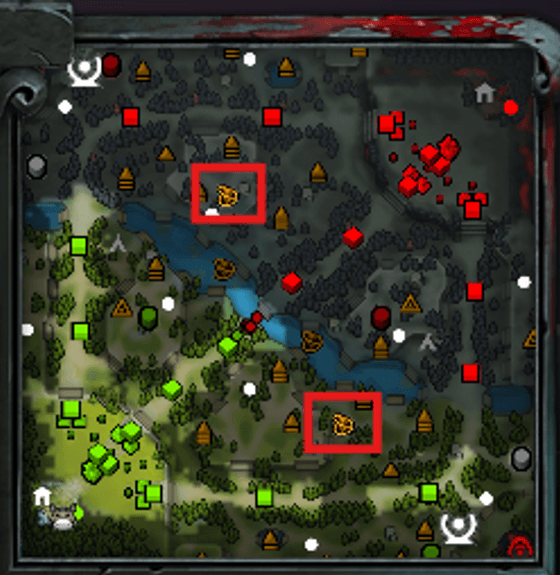
Every three minutes, four Bounty Runes will spawn: two at the two locations near the river and one at each team's respective jungle. The Bounty Runes generate gold for the entire team, gaining a slight yet significant economic advantage over the opponent. It is even more necessary to secure them during the initial stage of the battle, as the additional gold helps support by grabbing wards and sometimes boots.
You can also deny the enemy team the opportunity to access their Bounty Runes, thus impeding their farming and delaying the time they collect items. Supports play a significant role in this within the first part of the game when each gold available carries much weight.
Power Runes
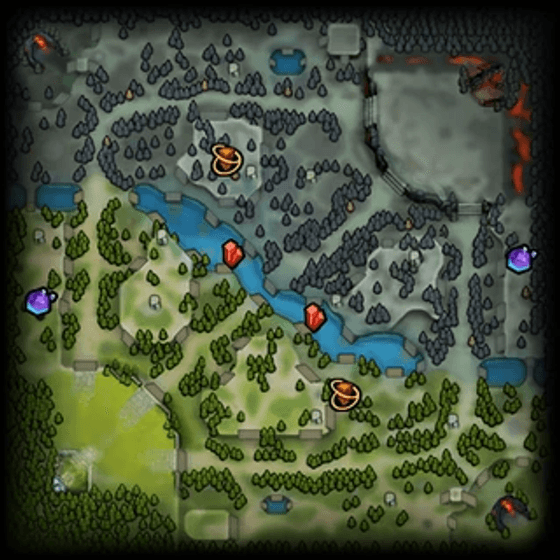
Power Runes will spawn in the river every two minutes and grant powerful temporary enhancements that can help in fights or ganks. Thus, you can get the following Power Runes:
- Haste – Lets you zoom across the map to escape or chase.
- Double Damage – Amplifies additional attack damage, which is perfect for carries.
- Invisibility – Ideal for sneaky ganks and surprise plays, gives temporary invisibility.
- Regeneration – Restores health and mana over time so you can quickly get back in fighting shape.
Midlaners benefit from the Power Runes the most by receiving an edge over their single opponent or helping their buddies on side lanes. Secure these runes with awareness and vision over the map so that you don't get into the enemy ambush.
High and Low Grounds
The entire Dota 2 map consists of high and low grounds, which significantly change the vision of combat dynamics. Thus, a player on high ground can see parts of low ground, while low ground cannot see above unless with the help of True Sight or wards.
Attacking high ground involves lots of preparations and vision management. Most high grounds are attacked with the help of Siege Creeps, Aegis of the Immortal, or a powerful team fight ability. Defending high ground enables teams to make use of their advantage in vision and eventually change the losing course of the game.
Lane-Specific Strategies
Now, we’ll get into specific lane strategies: Safe, Mid, and Offlane. With all the Dota 2 positions explained you’ll have a much higher chance of winning the game!
Safe Lane
The support in the Safe Lane must watch over their carry against enemy harassment while achieving three key things: harassing the enemy offlaner, denying the creeps to the enemy, and supplying vision. Another effective technique is pulling neutral camps into the lane. By doing so, your lane creeps start attacking neutral ones close to your safe tower, which denies the enemy team valuable experience and gold from lane creeps.
Aggressive vision is another key element of the Safe Lane strategy. This involves carefully placing the Observer Ward to track enemy jungle movements and farming patterns, providing crucial intelligence for your team’s decision-making. For instance, if the enemy offlaner or mid laner seems to be approaching your lane, you can either retreat to a safer position or prepare for a counter-gank.
Mid Lane
Lane equilibrium control is one of the most critical skills for mid laners. Balancing creep aggro with last-hit denial while also maintaining stability is instrumental in gaining an advantage over the opponent. Denying creeps is especially important as it reduces the amount of experience the opposing mid earns, effectively delaying their progress.
Rotations are also crucial for mid laners. After securing a powerful rune or pushing a wave, the mid laner should scan the side lanes for potential gank opportunities. With a well-executed rotation, your team can score a kill, a tower push, or a shift in momentum that benefits the team.
Offlane
In the early game, the main objective of the offlaner is to survive and gain experience. Denying creeps and contesting bounty runes are crucial for slowing enemy carry’s progress. The offlaner must also create opportunities to pressure the enemy carry and support so that they will have to spend resources such as healing items or mana. Proper vision and map awareness are critical in avoiding overextension and taking unnecessary risks.
As the game progresses, the role of an offlaner is to be a space-saver within the team. This involves pushing lanes, taking objectives, and initiating team fights. Heroes best suited for this role are those that possess strong crowd control or area-of-effects abilities, enabling them to disrupt the enemy team and create opportunities for their carry and mid laner.
Jungle and Neutral Creeps
The jungle, or a forest, is a critical area for farming and gaining an economic advantage. Understanding how to utilize neutral creeps and items efficiently can significantly impact your team’s success.
Farming Efficiently in the Jungle
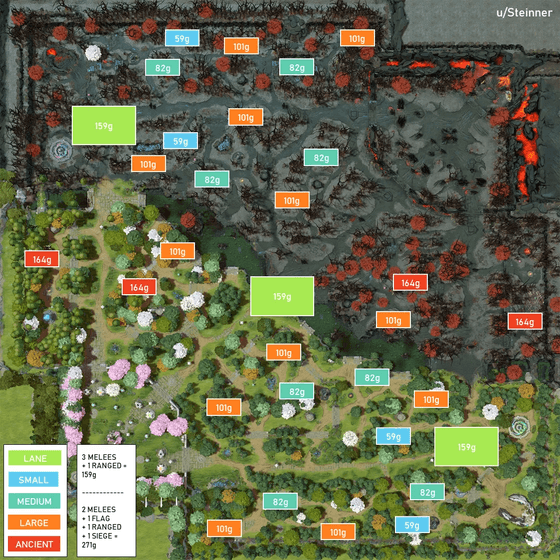
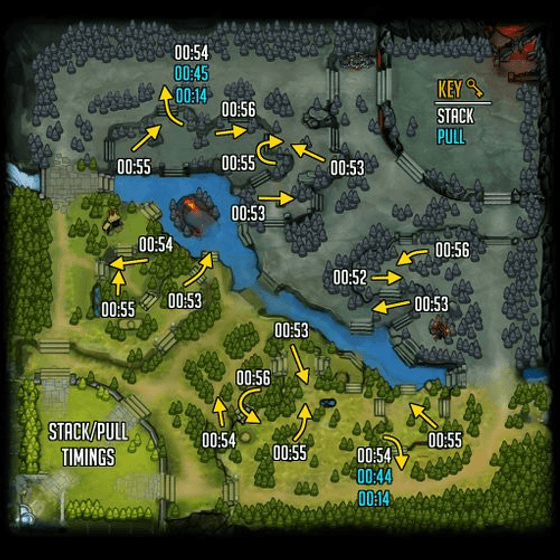
Pulling and stacking jungle camps are two activities that should be executed efficiently. Support players stack camps for their cores to finish farming later, while pulling camps into the lane helps maintain creep equilibrium and denies experience to enemies.
The following screenshot provides timing information that, when executed correctly, ensures safe and efficient farming for carries. It serves well for stacking several camps and maximizing gold and experience, particularly during the mid-to-late game when farm acceleration is crucial for carries.
Controlling Neutral Item Drops
Neutral creeps drop exclusive items at certain intervals that cannot be bought or obtained in any other way elsewhere. Securing these items should be your priority, especially in mid-to-late game sessions.
Neutral items are categorized into tiers, with higher-tier items unlocking as the game progresses. Hence, teams should prioritize getting neutral items in order to avoid missing out on the significant benefits, which may include survival, damage output, or utility. For instance, one such item is the Telescope, which adds a range bonus for vision, which is highly valuable among the supporters or initiators who rely upon being in certain places before acting.
Vision and Warding
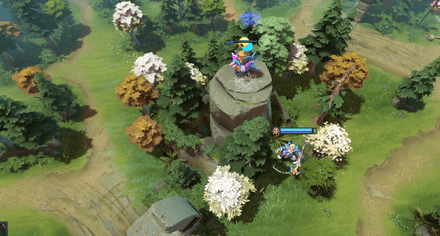
Vision is one of the most critical aspects of Dota 2. Therefore, proper warding and dewarding can provide a significant strategic advantage.
Key Warding Spots
Placing wards in the enemy jungle usually gives information about their movements and farming patterns, thereby aiding in better decision-making for your team. For instance, a ward placed near an enemy Ancient camp provides insight into the enemy carry’s farming activities, allowing your team to plan an interception.
Defensive wards around your jungle and objectives, on the other hand, help prevent enemy ganks and assist in protecting your heroes while farming. Ideal warding spots include the river, Roshan pit, and high-ground entrances. These locations serve as chokepoints for team fights and rotations.
Dewarding Strategies
Dewarding holds the utmost importance on the same level as placing wards. Sentry Wards should be placed in high-traffic areas, such as in the river or near jungle entrances, where they will help to detect and remove enemy Observer Wards. However, timing here is everything. Dewarding must be performed when the enemy is missing or where it would have a big impact, like the Roshan pit and farming paths. Denial of the enemy team's vision can lead to extra gank opportunities and deprive them of map control.
Map Control and Objectives
Controlling key areas and objectives is essential for securing victory in Dota 2.
Tier 1, 2, and 3 Towers
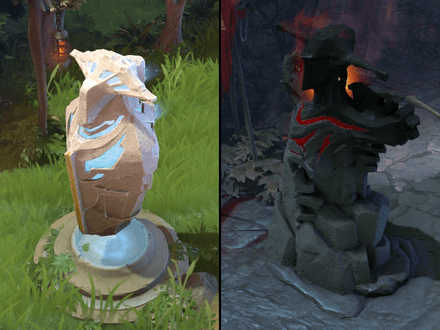
Tier 1 towers allow the team to control spaces on the map early in the game. Tier 2 and 3 tower positions in Dota 2 are cherished for high-ground defense, which is especially effective during mid-game.
Taking Tier 1 towers down early on in the game allows your team to have better map control and access to the opponent's jungle. This enables your team to benefit from a wider farming area, having an additional route to escape. Tier 2 towers and tier 3 towers prove to be very much tougher to fall, though they are important to crack high ground and reach your enemy’s barracks.
Controlling the Jungle and Outposts
Crippling the enemy economically by denying them jungle freedom and outposts will create chokepoints, forcing them into disadvantageous engagements. This can be achieved by stacking camps and clearing them quicker than your opponents, placing defensive and offensive wards, controlling high ground, etc. Standing Roshan is another main objective to secure the Aegis of the Immortal during late-game team fights. Vision and map control around the Roshan pit will play a significant role in ensuring a successful contest for your team while applying pressure on the enemy.
***
Understanding Dota 2 map positions and strategies is what any player needs to win a match. By learning Dota 2 lane positions, jungle and neutral creeps, vision and warding, and map control, you can step up your gameplay and take your team to a victory. Above all, remember that map awareness and objective control are the key points that set you apart from other players. Ward well, control key areas, and anticipate enemy movements to seize control of the game. Thus, by following our Dota 2 map positioning guide, you will prove to be an effective and impactful player!
