CS2 Anubis Callouts
Contents
Despite the CS2 update of July 16, 2025, which replaced Anubis with Overpass in the active duty map pool, this battlefield remains available in the Competitive mode. Moreover, Anubis is one of those maps that players can't help but enjoy thanks to its distinctive aesthetic and atmosphere. However, before you dive in, it’s essential to learn all the CS2 Anubis callouts if you want to be more effective on the battlefield and make the most of every round.
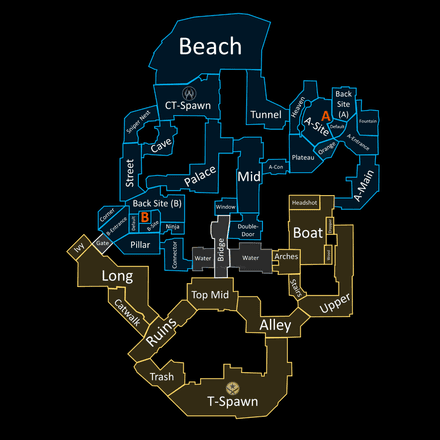
T SIDE
Since the map is T-oriented, it's only logical to begin the Anubis positions guide for CS2 players from the Terrorist perspective:
T Spawn
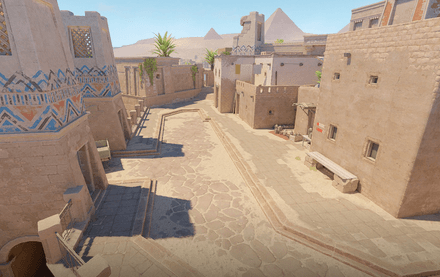
This is the Terrorists’ starting point, offering two primary routes that lead directly to the responsive bombsites.
Alley
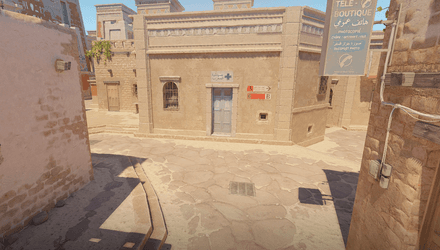
The Alley serves as a key connector between T Spawn, Top Mid, Stairs, and Upper, making it a vital route for early round strategies.
Upper
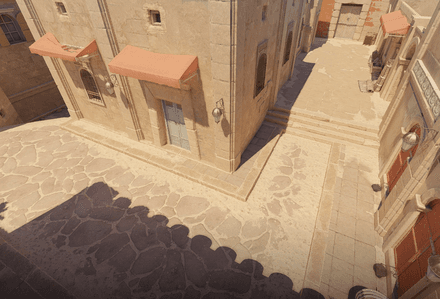
This path is commonly chosen for the A rush tactics, as CT Mid players won’t hear your team advancing, giving you a tactical advantage.
Ruins
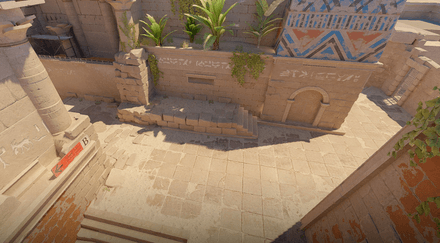
An alternative to the Alley, the Ruins connect T Spawn with Top Mid, while also granting access to the Heaven and B Long.
Heaven/Catwalk
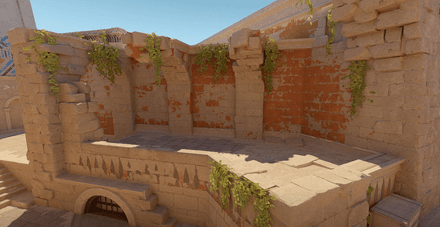
This route provides the easiest option for the B rush. However, players should be prepared for possible CT counter-rushes emerging from this direction.
MID
The CS2 Anubis map callouts on Mid are traditionally critical for both sides, as it grants stronger control over the entire map and allows faster rotations in response to threats.
Top Mid
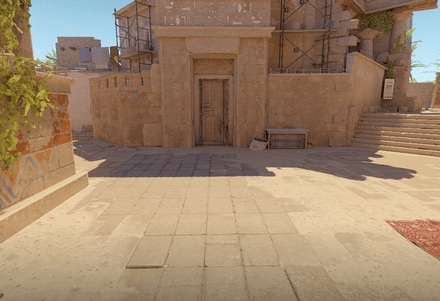
One of the favorite Terrorist positions when seeking an entry frag, especially with high-damage weapons such as sniper rifles or Deagles.
Bridge
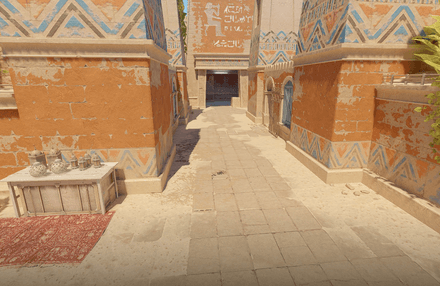
An ideal corridor for early duels, which quickly becomes a tactical choke point when used in combination with properly placed smokes.
Window
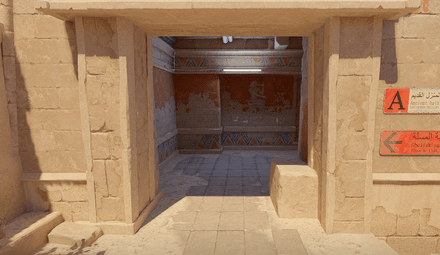
A defensive hot spot where CTs frequently position themselves, particularly if they had a nice spawn for early Top Mid picks.
Mid Doors
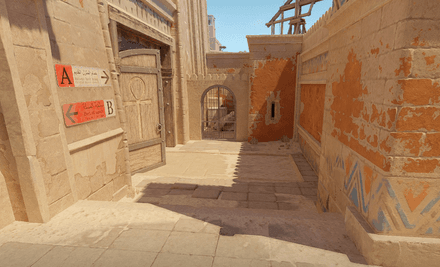
The Mid Doors and nearby areas are crucial for establishing Mid control not only for sightlines but also for gathering key sound cues.
CT Mid
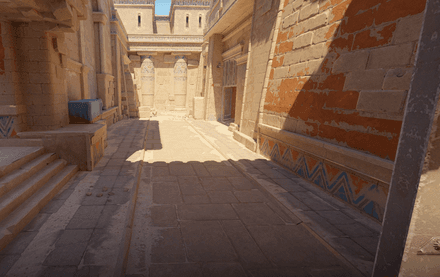
A pivotal rotation area for CT rotations, as it links the Middle with A Connector and Palace, allowing quick reinforcement of either site.
Canal
The Canal is essentially the under-Middle section of Anubis, but it holds equal importance for rotations and engagements. Knowing Anubis callouts here is just as vital.
Stairs
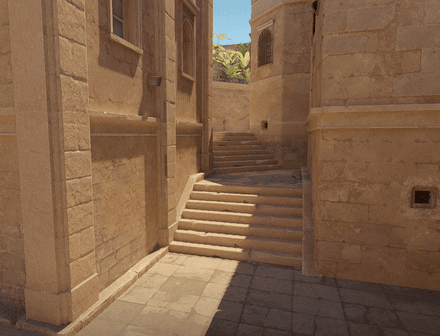
The Stairs connect Alley and Canal, enabling Terrorists to check the B Connector, control the Bridge, or set up against potential A Main pushes.
Arches
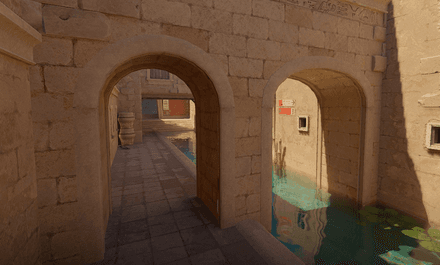
Two Arches provide excellent coverage for a T player who wants to contest the B Connector or engage opponents near the Bridge.
Water
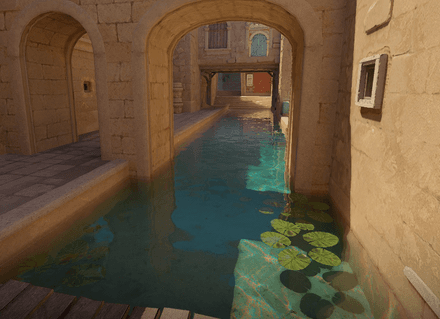
This is the main part of the Canal and a key rotation path from B to A and vice versa.
Boat
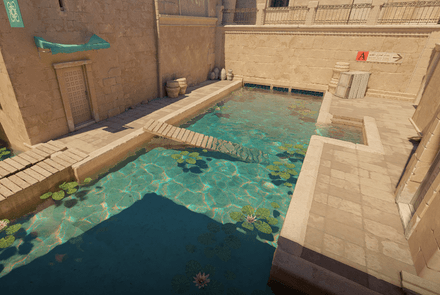
Although the physical boat was removed from later versions of Anubis, the name remains a traditional callout for this area.
Wood
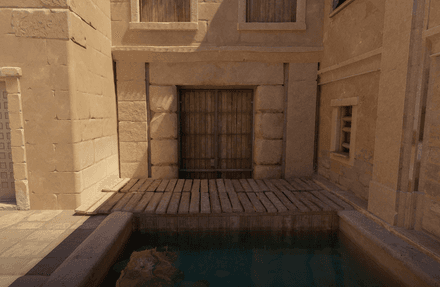
This can be a sneaky position that CTs can use as a ninja spot, provided they pass the Boat area unnoticed.
Drop
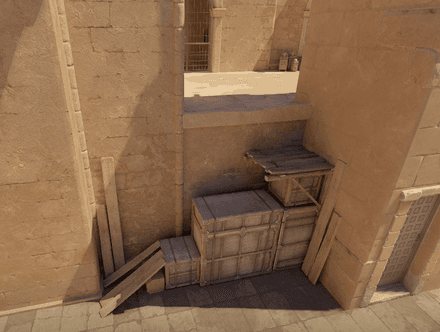
Map developers made this section relatively kind during modeling the Drop, as they ensured silent movement for those shifting through it, while still offering easy climb mechanics.
Headshot
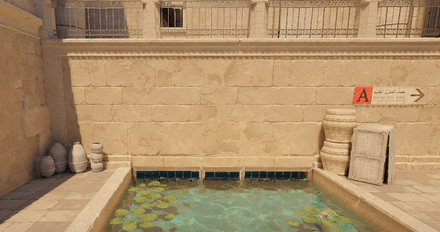
Positioned behind the Box near the signboard, this area provides a strong headshot angle for those pushing the A Main.
A SITE
Now, let’s turn from preparation to execution places, learning all Anubis positions CS2 players should master before hitting the A Bombsite.
A Main
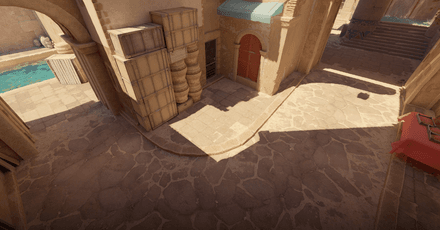
This is the initial contact zone if the teams decide to contest control around A Site.
A Entrance
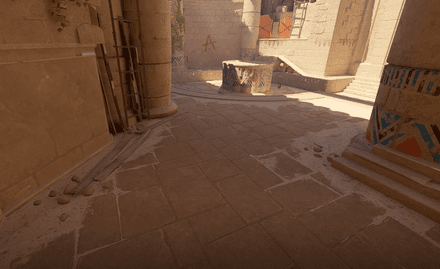
A spacious area connecting the A Main, Fountain, and the rest of the bombsite, frequently becoming the first major clash zone.
A Bombsite
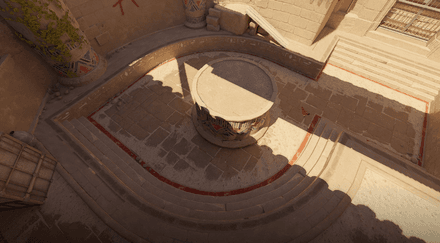
This is the bomb plant area itself, with the central pillar offering players partial cover during firefights.
Fountain
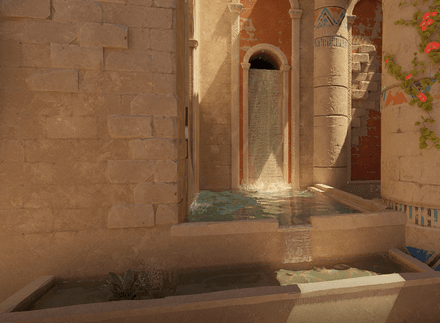
An alternative shooting angle for Terrorists during an A execution, usually combined with the A Entrance zone.
A Backsite
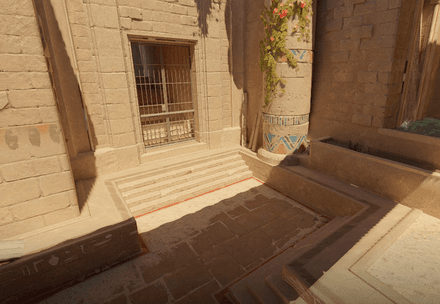
The A Backsite is a highly exposed section with no effective cover, making it a risky choice position for long time defense.
A Heaven
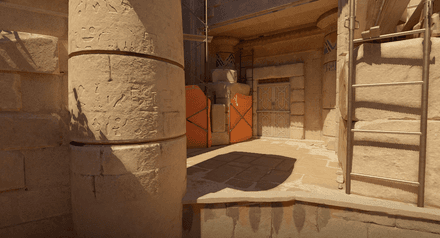
A classic for most maps, Heaven position is a perfect place for snipers, often used as an anchor point for retakes.
Plateau
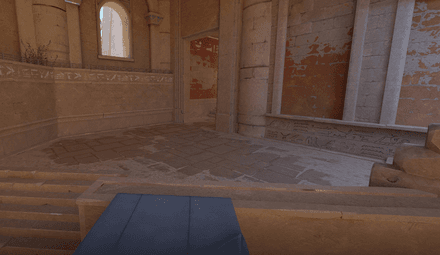
A common defensive position that Terrorists tend to smoke in order to neutralize vision from both the Heaven and A Connector.
A Connector
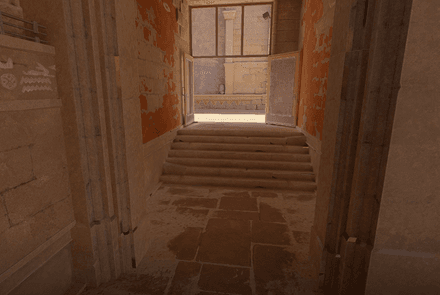
A narrow yet critical path between the CT Mid and Plateau, allowing fast rotations or split pushes.
Orange
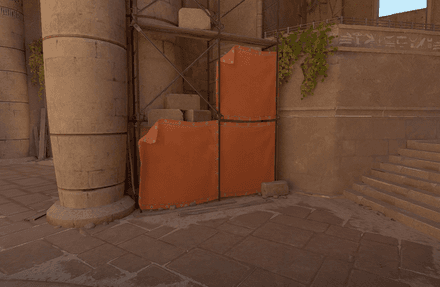
A small but valuable defensive corner on A Site, which works well if you have teammates covering you from other defensive spots or if you're just looking for a safe space during clutch scenarios.
If you often play supportive roles, read some CS2 support role tips so you know where to hold or rotate on Anubis and quickly communicate information to teammates.
B SITE
For an effective B Site execution, knowing the correct Anubis map callouts is absolutely essential.
B Long
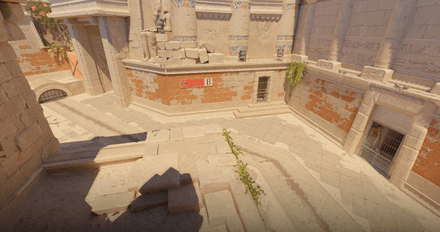
This is a setup zone for Terrorists, who often use it to line up grenades before entering the site.
Ivy
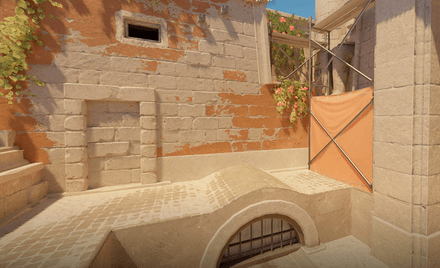
A sneaky corner near B Main that becomes particularly useful when the B Main smoke is active. It provides an additional firing angle before the entrance.
B Main
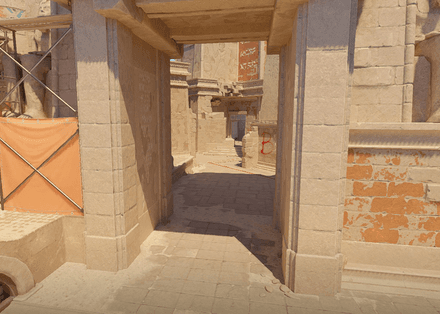
A narrow path linking the T-controlled B Long to B Bombsite, often contested early in the round.
B Entrance
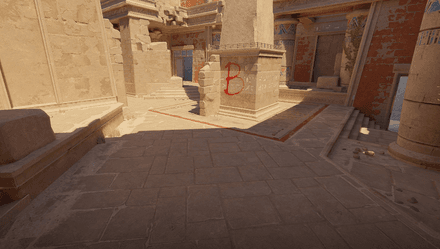
The choke point where both sides usually clash first, especially when utility has been exchanged.
B Bombsite
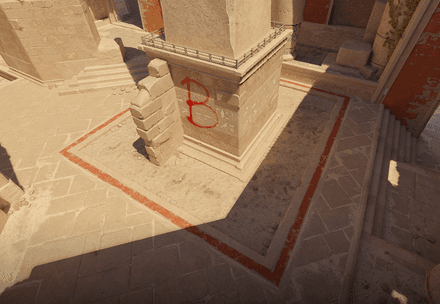
A limited area for planting the bomb with a cover in the middle, offering opportunities for both planting and post-plant crossfires.
Corner
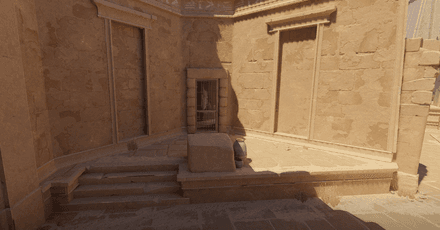
A defensive angle near the B Main, often serving as a post-plant position for Terrorists or as a holding spot for CTs.
Pillar
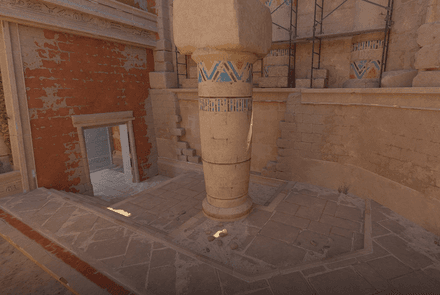
A small cover spot ideal for defending both the B Connector and B Main simultaneously.
B Connector
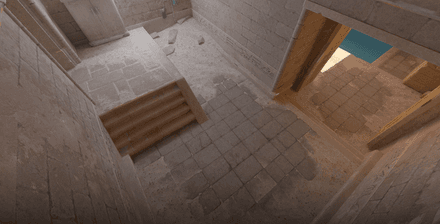
A contested room with high stakes, useful for early picks from Stairs, B Site executions from the Water, or late-round clutches.
B Backsite
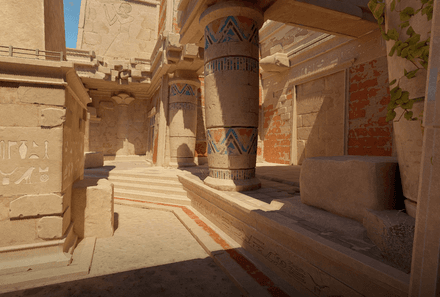
Located at the far end of B Site, this area doubles as both a defensive position and the Palace exit point.
Ninja
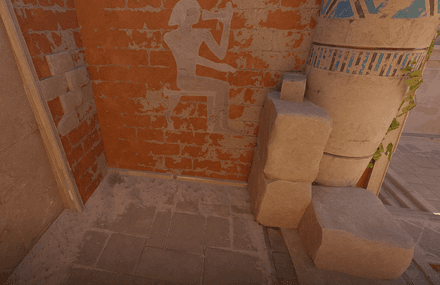
A tiny hiding spot near B that can surprise Ts and put them at a disadvantage. Therefore, it’s quite common to smoke or molly this position.
Palace
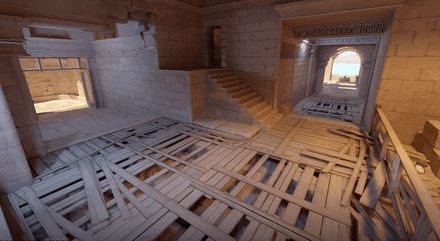
A spacious interior zone with two corridors linking CT Spawn, CT Mid, and B Site.
Street
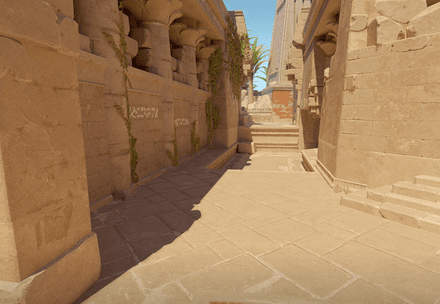
Part of B Site, this area connects the CT Spawn with the bombsite and is often used as the main defensive zone by CTs.
Studying the CS2 Thera callouts map will help you figure out how to play this map and pass information faster.
CT SIDE
The CT Side is less frequently discussed on the map, but the compact design of Anubis made it highly important for CT rotations and T lurkers.
CT Spawn
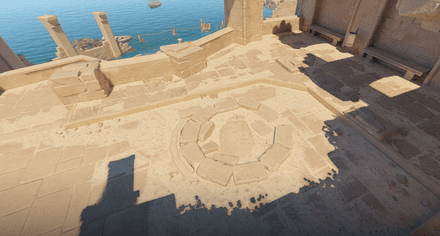
This is the Counter-Terrorists’ starting point, often used for throwing default smokes at the beginning of the round.
Beach
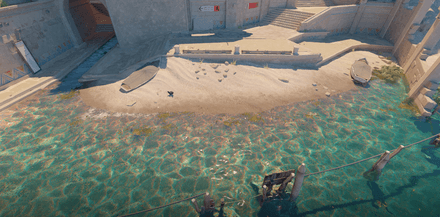
Rarely contested, the Beach connects the CT Spawn with B Tunnel. It is most commonly used for saving weapons.
Tunnel
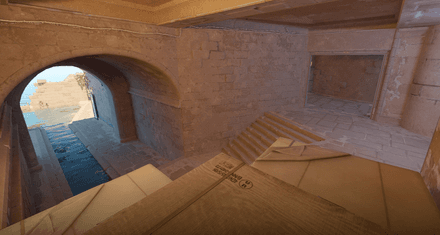
This is a crucial rotation route from CT Spawn to A Site, it is especially valuable if Terrorists have taken control of the CT Mid.
Sniper Nest
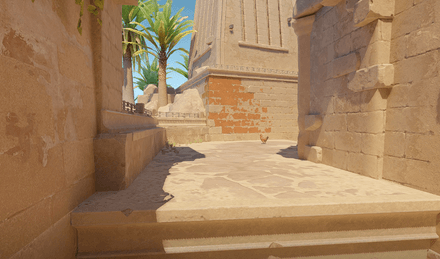
A strong early-round position that gives CTs a controlling angle over opponents pushing the B Main, especially near their spawning points.
Cave
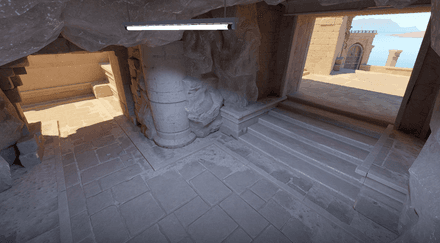
An alternative path from the CT Spawn to the Street and B Site, offering additional firing angles and reliable cover for defenders.
Conclusion
Effective communication is the decisive factor that separates solo players from good teammates. Knowing position names beyond the minimap hints is therefore an essential skill. Moreover, mastering precise Anubis callouts can make a noticeable difference at any level, as better coordination consistently translates into winning more rounds on compact maps. Therefore, spending an extra 5–10 minutes memorizing the map’s callouts will give you an edge and secure a few extra victories every time you step onto the Anubis battlefield.
FAQ
If you prefer solo play on Anubis, it’s better to prioritize the Water and Mid for early T-Side fights, or take lurk positions near the A and B Main. When playing as the defender, it’s also easier to play Window and Double Doors (Middle) without support, or choose anchoring positions that allow falling back on A (Heaven, Plateau) and B Sites (Street, Palace).
For Terrorists, the main rotation paths on Anubis are Mid and Canal, so simply add the name of the bombsite when calling a rotation. For Counter-Terrorists, CT Mid is usually the preferred rotation route between the bombsites, but CT Spawn can be used if Mid control is uncertain.
Every grenade should be thrown with a clear purpose on any map. We’ve prepared a dedicated CS2 Anubis smokes guide to help you learn the most effective lineups for each site.
A successful retake starts from analyzing the available information about the Ts: evaluate their approximate number, and positioning of enemies using callouts. Next, you should coordinate your actions with teammates and determine your remaining grenades and their best usage in a particular situation. The final piece of an effective retake is reacting instantly during the skirmish and providing accurate information to teammates, enabling them to trade and secure the round.
