Best Dota 2 Settings and Options
Contents
No matter what game we play, the first step is always adjusting the settings. This process can be tricky, especially in complex titles like Dota 2 with its vast range of customization options. But don’t worry, today, we’ll guide you through the best Dota 2 settings. From video and audio to controls and interface, we’ll help you configure everything for the smoothest and most enjoyable experience. Our walkthrough will stay simple and concise yet full of useful insights and practical tips. So, let’s dive right in.
Video Settings
First, you need to click the gear icon in the top-left corner of your screen. You will be redirected to the Settings menu. Valve has revamped it not so long ago, so the menu is really intuitive and user-friendly now. Once there, either choose the Dota 2 video settings in the list of tabs on the left, or just type Video in the search bar in the top left of the Settings menu.
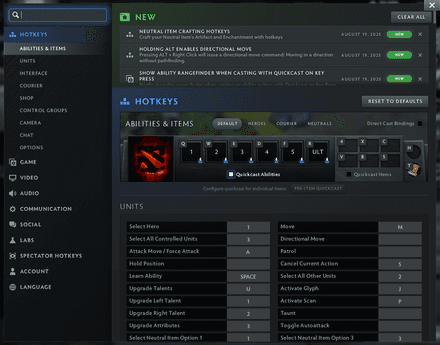
The Dota video settings section is split into three parts: Display, Rendering, and Options. Let’s go through them one by one.
Display Settings
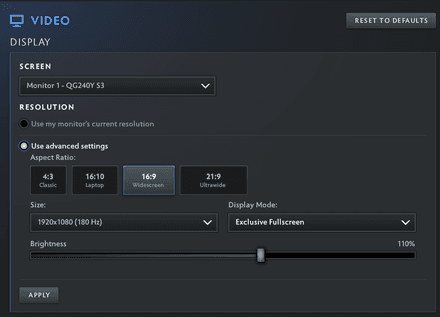
In the Display block, you can choose the monitor for Dota 2 to use, set resolution, aspect ratio, and display mode.
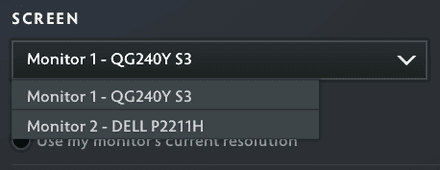
Configuring Screen is simple — just select the one you want to use for Dota 2 from the dropdown menu.
Next up are Resolution settings. For most players, it's enough to check “Use my monitor’s current resolution,” allowing the game to adjust to your operating system configuration. It’s simple and effective, yet it may have cons. Thus, higher resolutions (like 1440p or 4K) are more demanding and can lower your FPS. Also, some users report the game defaults to 60Hz with this setting enabled. So, if you are to use it, make sure to check your refresh rate manually.
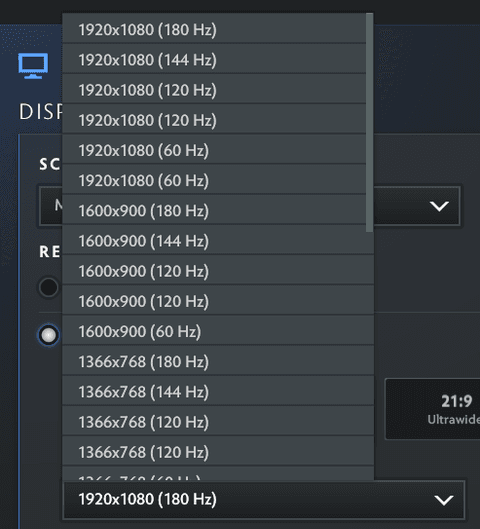
For Aspect Ratio, it’s the same as with resolution: pick the one that your screen supports and that feels the most comfortable. Note that setting an unsupported aspect ratio may cause errors and make Dota 2 unresponsive.
The last thing to configure in this section is the Display Mode. There are three options:
Exclusive Fullscreen
Pros:
- Performance: This mode fully utilizes your GPU, delivering higher FPS and lower input lag.
- Refresh rate: If you want to use high refresh rates (144 and above), making it the best choice for competitive play.
Cons:
- Slower Alt-Tab: Switching to desktop and game using exclusive fullscreen can take longer and may cause temporary stutters.
Borderless Window (Windowed Fullscreen)
Pros:
- Smooth Alt+Tabbing: Borderless window is the best option for multitasking, such as streaming, chatting, or browsing.
- Stable with overlays: Go for windowed fullscreen if you’re going to use applications like Discord or Steam overlays.
Cons:
- Possible delays: Borderless window causes slightly higher input latency compared to Exclusive Fullscreen, so a delay may be present even on high-end setups.
- Refresh rate lock: The mode may default to 60Hz, though this can usually be adjusted manually.
Windowed:
Pros:
- Customization: You can set the window to any size and easily drag it anywhere on your screen.
- Fallback option: Typically, when people encounter problems with Exclusive Fullscreen and Borderless Window, they use a Window mode for troubleshooting.
Cons:
- Performance: This mode is the worst for gaming. Prepare for the lowest FPS and higher input lag if you actually want to play Windowed.
Rendering Settings
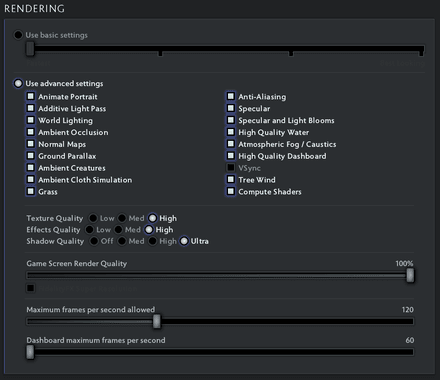
The last section of Dota 2 Video Settings is Rendering. You can either check “Use basic settings here” to adjust the overall preset with a single slider (the more to the left, the better the quality; the more to the right, the better the visuals). However, for finer control, we recommend checking “Use advanced settings” for a manual setup.
Right below the “Use advanced settings”, you will see a range of graphical options that mostly affect minor visual details. So, we suggest every player experiment to find your personal balance between visual quality and FPS performance.
Further down, there are three separate sliders for the quality of Textures, Effects, and Shadows quality. Here, you might experiment to find your balance as well. However, to adjust the game for the best performance while keeping the visuals decent, you can leave Textures at high or medium, and set Effects and Shadows to low or off.

Next up in the rendering section is the Game Screen Render Quality slider. In other words, it’s resolution scaling. The slider lets you trade sharpness for performance — lowering it makes the game look blurrier but improves performance, while keeping it at 100% gives the sharpest visuals if your PC can handle it.
Right below, you’ll find the Fidelity FX Super Resolution checkbox. This is a smart sharpening filter developed by AMD. In simple words, it enhances blurry visuals and makes the overall image crispier without impacting performance significantly. While not essential, some players find it useful to make the image crisper, especially with lower graphics presets. So, try it for yourself if needed.

The next slider is the Max FPS allowed. Adjust it according to your preference, but keep in mind that FPS exceeding your monitor’s refresh rate can lead to screen tearing.
Finally, there is also a Dashboard Max FPS slider, which caps frames when you’re not in a match. We recommend setting it to 60 as the dashboard is GPU-intensive and higher values may lead to overheating and annoying noises, while making little to no visual benefit.

Additional Video Options

The last section of the Dota 2 Video Settings is called Options, which includes only two key features: Rendering API and NVIDIA Reflex Low Latency.
For Rendering API, you have two choices: DX11 and Vulkan. For years, DX11 was the default choice unless you were on Linux. However, Valve has significantly improved Vulkan, and now it runs smoothly on most Windows setups as well. Choosing Vulkan may improve performance and stability on modern systems.
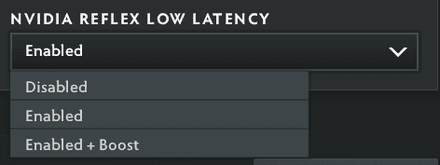
NVIDIA Reflex Low Latency is exclusive for NVIDIA GPUs (GTX 900 series or newer) and helps reduce input latency. In Dota 2, you can set it to Enable (synchronizes the CPU and GPU better), Enable + Boost (adds a GPU clock boost to further reduce latency), or Disable. Is it one of the best Dota settings for performance? While it’s not necessarily a must-have for performance, it can provide a subtle advantage in competitive scenarios and is worth trying if you have a compatible GPU.
To decide which API to use, read our Dota 2 Vulkan vs DirectX comparison for a full performance breakdown.
Audio Settings
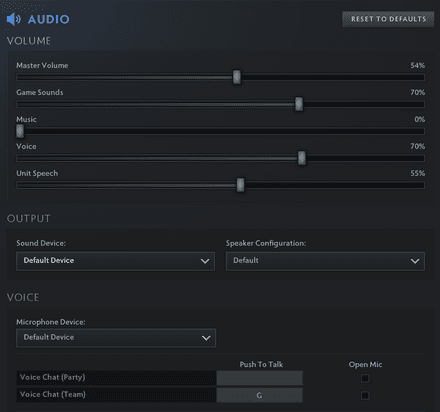
Volume
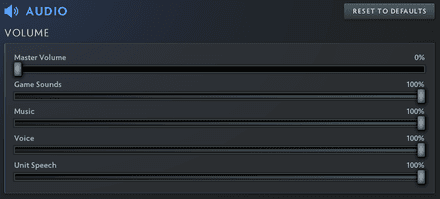
This section contains five volume sliders. Adjust them according to your personal preference, but remember that for a deeper competitive experience, make sure to keep the Voice slider above 50% so that you can clearly hear teammates.
Output

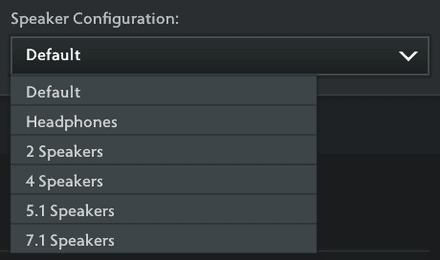
Here, choose your headphones from the Sound Device dropdown. If you’re using headphones, select the correct model; if you’re on speakers, there are multiple options to match your setup.
Voice
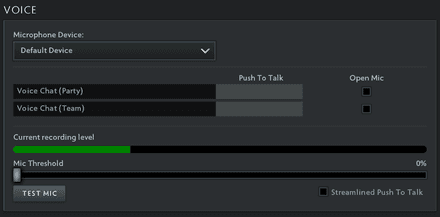
Next up are the Voice settings. First, select your microphone from the Microphone Device dropdown menu. Below that, you can find a block where you can assign regular and party Push-To-Talk hotkeys. To the right, you can place a check if you want to use Open Mic, allowing you to speak without pressing a key.
Further down, there is the section where you can test your mic configuration. Just hit the “Test Mic” button, say something, and see whether people can hear you in the Current Recording Level field. Here, you can also enable Streamlined Push-to-Talk, which keeps the recording device active and prevents freezes.
You can also set Mic Threshold to avoid screams from annoying teammates if you are on speakers, or in a noisy room.
Additional Audio Settings

The remaining Dota 2 sound settings go under the simple “Options” tag and are basically up to your personal preference. They do not significantly affect gameplay, so feel free to experiment and set them according to comfort.
The best launch options for Dota 2 really help with performance, check out which ones we recommend.
Control & Hotkey Settings
Next, we move on to the best settings for Dota hotkeys and controls. Go to the Dota 2 Settings and select the Hotkeys tab. This section is extensive, so let’s break it down step by step.
Hero and Unit Controls
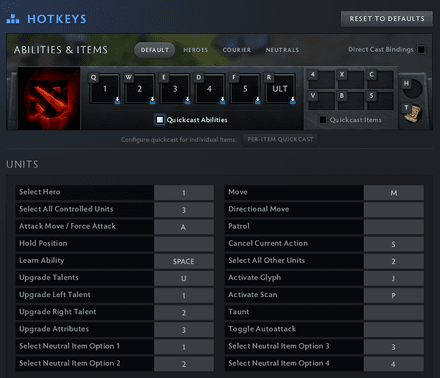
At the very top of the Hotkeys section, you will see Abilities & Items. Here, you can assign any key to your 6 abilities and your 6+2 inventory slots.
By default, all heroes share the same keyboard layout for it. However, if you want, you can customize each hero by clicking the Heroes tab right above the area for assigning keys. Then, select a specific hero to see their abilities. Use the GUI to assign new keys. You can also configure couriers and controlled units by switching tabs above.

Quickcast

You can also opt to quickcast your abilities and inventory slots — one of the best settings for Dota 2. There are two separate checkboxes for Ability Quickcast and Inventory Quickcast.
By default, using an item or a skill requires pressing the assigned key first, dragging the cursor, then clicking. Quickcast allows you to remove the click part, so you can do things faster. Just put the cursor where you need it and press the button.
You can also enable Direct Cast Bindings. This feature allows you to assign Quickcast to specific abilities or inventory slots.
Chat Hotkeys

There are two chat channels in this game: General and Team (both text and voice). You will be using both of them a lot in your games. Even if you’re not into speaking with teammates, chatwheeling, and arguing, you need at least a text chat key assigned to monitor important game events like runes, deaths, and gold.
Interface Hotkeys

Next up are the hotkeys for the Interface. The most important ones to assign here are Scoreboard and Pause. This is especially helpful if you’re planning to go for a deeper configuration using the developer console or want faster access to in-game menus.
Camera Hotkeys
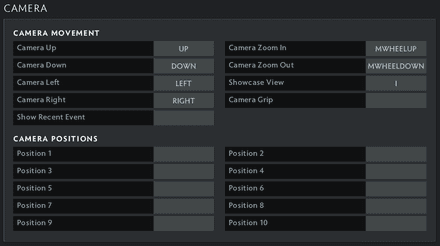
Dota 2 even has separate hotkeys for the camera. They include camera movement and specific map position keys. Some settings, like Camera Zoom in and out may be optional, but Camera Positions are kind of OP. They allow you to assign keys to specific places on the map for your camera to jump there when you push that button.
Additional Controls
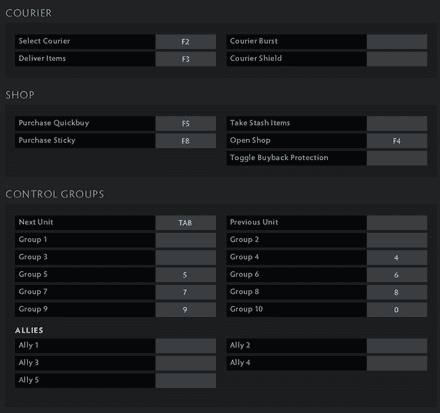
The hotkeys in the Courier section are pretty self-explanatory and mainly cover the courier’s protective abilities.
Purchase Quickbuy is the key option under Shop hotkeys, so assign a button you can easily press quickly and comfortably at any point in the game. Open Shop is another highly used function among many players, so it’s best to choose a key that feels natural and easy to access.
Next are the Control Groups hotkeys. The most important here are Next Unit and Previous Unit buttons. The Group 1–10 buttons are particularly useful for heroes who control multiple units, such as Meepo or Beastmaster. If you play such heroes often, you likely already know how these hotkeys work and why they matter.
Interface Settings
We follow up with the Dota 2 best settings for the interface. There isn’t a dedicated tab in the menu for them, but they are available under the Game tab, so you need to go there first.
Minimap Settings
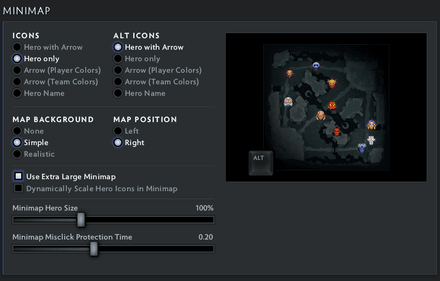
In the Game tab, scroll down to the Minimap section. You’ll find several customization options here, and most of them come down to personal preference. However, we strongly recommend enabling Use Extra Large Minimap, as it makes navigation and map awareness significantly easier.
Camera Settings
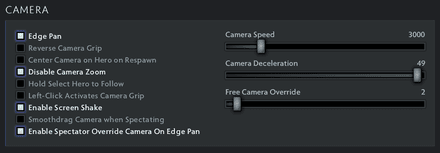
The next section adjusts in-game camera behavior. While many of these options may seem like personal preferences, some of them can actually provide a competitive advantage. For instance, Enable Screen Shake can help you avoid ganks by alerting you to approaching enemies before they get too close. Also, disabling Camera Zoom will save you from awkward moments when you accidentally zoom in mid-fight and lose sight of the battlefield.
Interface and Healthbars
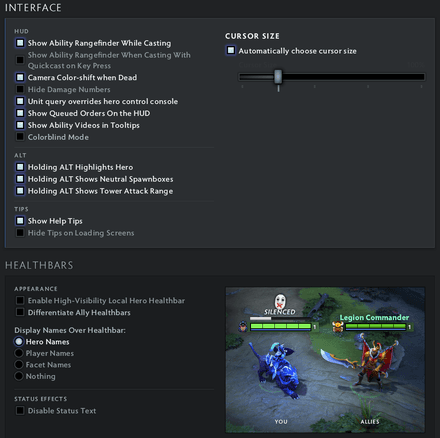
This section, literally called Interface, includes advanced configurations that generally work well with default values. However, there are a few useful options worth noting, such as enabling Colorblind Mode or Newbie Advice if needed.
The following subsection is dedicated to health bars exclusively, but it’s not so big. To keep it simple, the best thing to go here for a newbie-friendly experience is Hero Names, for a minimalist look — Nothing, for the most competitive one — Facet Names. Additionally, make sure you have Disable Status Text unchecked.
Good settings are great, but don’t forget your conduct. Our guide on how to increase behavior score in Dota 2 may help.
Game Settings
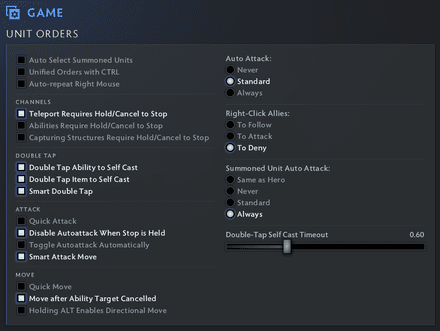
Next, let’s move to Game Settings. There are few essential checkmarks to place.
The first one is Auto Attack. You can hover over the three available options to see how they work and choose the one that suits your style best. Once selected, look for the Summoned Unit Auto-Attack section to decide whether you want your controlled units to have the same auto-attack mode.
The second essential thing to configure here is Right-Click Allies. Selecting To Deny arguably makes creep stealing easier, which can often contribute to winning more lanes.
Now, look to the left and consider placing a check mark next to “Teleport Requires Hold/Cancel to Stop.” If not placed, you risk accidentally canceling your teleport, which is one of the most frustrating mistakes in the game.
Network Settings

Last but not least are the Network Settings. There’s no separate tab for them in the main menu, so go to Miscellaneous. Choosing the right Network Quality setting is crucial. Selecting a wrong option may lead to freezes, delayed commands, or even disconnections. On weaker connections, this may directly cost you a match, so select the option that best suits your internet stability.
Conclusion
The Dota best settings can vary depending on skill level, goals, hardware, and even your internet connection among many other factors. However, the game offers massive configuration options, allowing every player to find their own sweet spot. While some settings can provide a clear competitive advantage, most of them are designed to simply make your experience as enjoyable as possible. Share your thoughts and ask questions on Dota settings. See you soon!
